#putting my two top interests together in a saucepan and stirring well. the recipe to happiness
Explore tagged Tumblr posts
Text


doodles from some weeks ago because ive been artfighting so i dont have anything else to put here
#reguri#pokemon#my art#ookido green#trainer red#trainer green#blue oak#green oak#yes this is inazuma eleven x pokemon content these are my two favourite things ever bear with me#too niche??#i dont know i think theyd be friends probably#then again endou is friends with everyone#friend beam#putting my two top interests together in a saucepan and stirring well. the recipe to happiness#i love these guys
274 notes
·
View notes
Text
❄❄❄
***
*German Christmas Goose ( Weihnachtsgans )*
Total - 2 hours and 30 minutes
Prep - 30 minutes
Cook - 2 hours
Yield - 4 servings
*Ingredients
For the Goose:
4 1/2 - pound goose ( cleaned and dressed, no gizzards )
Dash salt ( or to taste )
Dash pepper ( or to taste )
2 teaspoons dried thyme
2 apples ( peeled, cored, and quartered )
1 small onion ( cut lengthwise into 1/4 - inch - wide strips )
1 tablespoon salt ( mixed with 1 cup water )
For the Gravy:
2 tablespoons goose drippings
2 tablespoons all - purpose flour
1 ( 14 - ounce ) can chicken broth ( or homemade chicken stock )
Optional: salt
Optional: pepper
Optional: dried thyme
*Steps To Make It
Note: while there are multiple steps to this recipe, this dish is broken down into workable categories to help you better plan for preparation and cooking.
*Make the Goose
1. Gather the Ingredients.
2. Heat oven to 350 F.
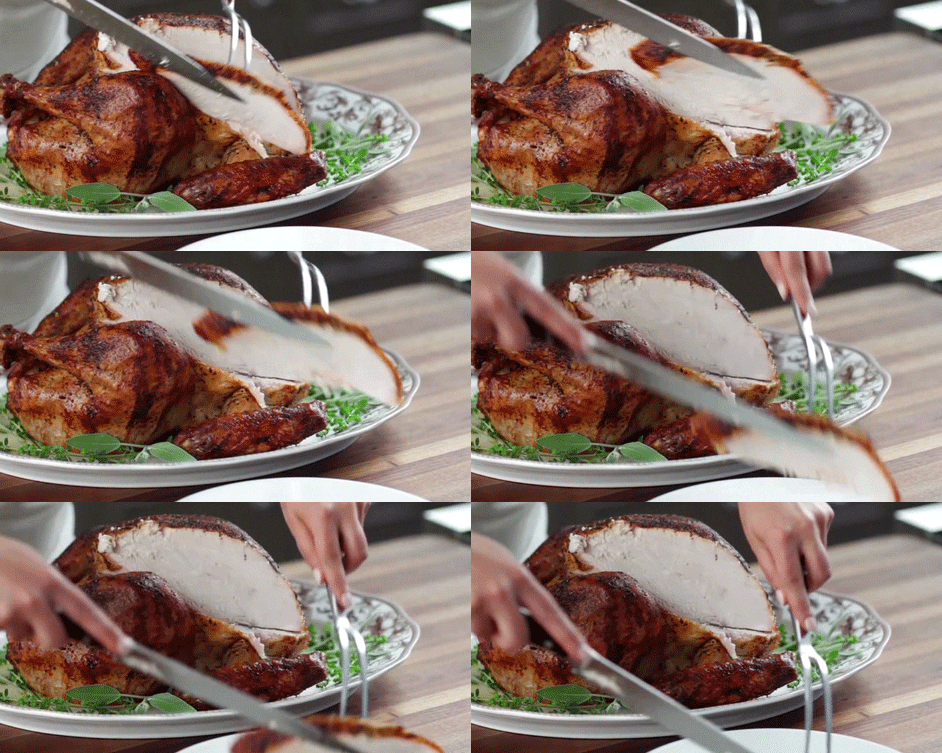
3. Wash and dry the goose, like you would a chicken or turkey. Sprinkle salt, pepper, and thyme inside the cavity and fill with apple quarters and onions. If they don’t all fit, you can cook them alongside the goose in a small, buttered dish.
4. Mix 1 tablespoon salt with 1 cup of water and pour that into the bottom of the roasting pan. Place the roasting rack on top. Pierce the goose skin in several places to let the fat drip out as it cooks.
5. Put the goose, breast - side down, on the roasting rack and place in oven for 50 minutes. Use the salt water mixture to baste the goose several times during this period. Add more water to drip pan if necessary. Turn the goose over onto its back and cook, basting as needed, for 50 minutes.
6. Let the goose rest for 5 minutes as you make the gravy.
*Make the Gravy
1. Gather the ingredients.
2. Mix 2 tablespoons of the fat drippings with 2 tablespoons flour in a small saucepan and cook for 1 minute. Gradually add the chicken broth, stirring well after each addition. Add salt, pepper, and thyme, if desired, to taste. Keep warm.
3. Serve the goose and gravy with canned peach halves decorated with currant jelly ( if you don't want to make currant jelly or can't find it prepared, cranberry sauce is a fine substitute ), buttered Brussels sprouts, potato croquettes ( or mashed potatoes ), and the cooked apples and onions.
***
❄ Three Wishes ❄
***
V

***
A plump, elderly woman with very gentle and motherly features clapped her hands and addressed everyone in the room. "Let's get to work, everyone!"
"Let's go, V." You told the poet as you motioned for him to follow you into one of the classrooms.
At first, V didn't understand it when you said you needed someone to play the violin during a book reading session. But, now, he understood. Turned out you're working as a teacher in a kindergarten a few blocks away from Avery's mansion.
Well, for one thing, V could totally imagine you spending your time around lots of children who adore you and play a lot with you. He felt you were just that perfect kind of person in this type of working environment: warm, caring, protective, nurturing,...
... loving,...
I wonder how she would be like as a mother of,...?
"Here it is." V was brought back from his musings and reverie when you handed him your partner's violin, which you were carefully carrying.
The poet examined the instrument and hummed in satisfaction. But, then,...
"I have a question." V quietly asked.
You hummed in question as you positioned yourself in front of the cabinet piano.
"Why did she leave this here?"
"I'm sorry?"
"I mean, this instrument. This actually looks," He muttered, once again looking at the delicate instrument in his hands. " ... very well taken care of. I can't imagine someone just leaving an instrument like this here."
"Oh, you're a keen observer." You answered as you took out the sheet music you bought from the music store with V from your (F/C) hand bag. "My partner never really tells me anything too personal, actually. But, one day, she just,... I don't know,... kind of became depressed.
"She stopped practicing the violin, which was affecting our work in a way. I wanted to help her so, I asked. And you know what she said? She just said, it's hard to love someone who could never love you back, you know? I actually never knew if she had a boyfriend, or not but, all I know is that there was this really tall guy with white hair who used to visit her. Then, for some reason, he stopped visiting her. A day later after we talked, she asked for a short break. And, here we are!
"It was kind of intriguing, really." You said as you shrugged your shoulders.
“It sure is.” V answered as he thought of the violin’s owner, who must be tending to a broken heart as of the moment. "Love can do many things to you. It could lift you up to the highest of heavens, and one wrong move, it could drop you to ground without you ever knowing it."
“Then, she must have one heck of a fall from the highest of heavens.”
"Hmm. Well," V replied as he plucked the strings of the instrument to check how much it was off tune. " ... who am I to judge?"
"Yeah, me too." You sighed, allowing yourself to slouch as some unsavory experiences regarding that stupid thing called love came back to haunt you. Forcefully pushing those thoughts aside, you sat up straight and hit the C note on the piano. "Let's practice, V."
A few hours later, the place began filling up with excited little children in cute, fluffy sweaters together with their parents. The faculty members, which consisted of the kindergarten's headmistress called Sister Christina ( the retired catechist from Germany who cooked most of the meals for the feast later on ), the teachers Alicia ( a sweet young lady from Spain who did the colorful and really festive decorations ) and Natasha ( a very tall, very lovely and very haughty - looking Russian who made the desserts ), you ( the music teacher ), together with the invited guests V ( who was honestly overwhelmed by the presence of all these adorable little children ), Avery ( who took a day off from work just to participate in the event ), and Nico ( who was doing something pretty suspicious in her van together with Griffon and Shadow ) all greeted the children and parents and made them gather in one of the classrooms. The program started off with a prayer by Sister Christina, followed by a simple, little opening speech from Alicia.
V watched in awe as the little children ( now wearing cute costumes ) performed with so much energy. Some of them danced ( there was this adorable little number from a group of sugar plum fairy princesses and a fawn prince ), some of them sang ( he couldn't help but smile as they did a Christmas medley of Hark The Herald Angels Sing, Away In A Manger, and Joy To The World ), and some of them even acted out some scenes from Frozen, playing as its popular characters ( the most famous act was the one from, of course, Elsa the Ice Queen ).
And then, there was this little boy ( who was in his early nineties costume ) who came forward and simply bowed down. A resounding aww was heard all over the place from both parents and teachers, and when he took a deep, exaggerated breath, everything went silent.
"The Lamb." The little boy announced with his clear voice, then bowed once more. It surely perked up V's interest in an instant, being a huge fan of William Blake, himself.
Blake at such a young age? He thought with such admiration. How commendable!
"Little Lamb who made thee, dost thou know who made thee? Gave thee life and bid thee feed. By the stream and o'er the mead."
"Aww, how cute is that?" V heard you whisper next to him.
The little boy went on. "Gave thee clothing of delight, softest clothing woo - "
"Woo?" You whispered, realizing that the child was probably forgetting the poem.
The poor boy shook his head and tried to recite once more. "Gave thee clothing of delight, softest clothing woo,... wool,... wooloo,... "
"Wooloo?" Avery, who was sitting on the floor right next to you, questioned. "Isn't that a Pokémon?"
"Oh, no!" V saw you awkwardly divert your eyes as you were unable to bear the situation.
"Gave thee clothing of delight, softest clothing woo,... wooloo,... " The little boy tried once more to recite. He was about to give up as he became more and more frustrated with his inability to pronounce the word properly, until his eyes landed on V, who was smiling at him while pointing at his own lips. And as the little boy looked at V, he noticed the way he was forming his lips, like he was saying something,...
Woo,... lee,... V mouthed.
The smart child picked up on this immediately and went on with his poetry. "Gave thee clothing of delight, softest clothing wooly bright."
The crowd breathed a collective sigh of relief as the boy finally remembered the lines. Smiling wide from ear to ear, he went on, "Gave thee such a tender voice, making all the vales rejoice! Little Lamb who made thee, dost thou know who made thee?"
Cheers erupted from the crowd as the little boy finished his recital. After the little program, everyone proceeded to the canteen to partake of the feast that was prepared for all of them, the German Christmas Goose dish that was lovingly made by Sister Christina being the center of attention ( it was very well noted how Griffon felt horrified looking at the poultry meal on the table, which made Nico almost collapse in wild laughter ).
About two hours of feasting later, all the guests were gathered into the same classroom, this time, for the book reading session that you and V were preparing for.
The story was about Little Red Riding Hood, and how she escaped the wolf who pretended to be her grandmother to eat her. And the main protagonist was played by none other than Avery, herself.
"One morning," Alicia read as you started playing simple notes on the piano. " ... Little Red Riding Hood asked her mother if she could go to visit her grandmother as it had been awhile since they'd seen each other. That's a good idea! her mother said. So they packed a nice basket for Little Red Riding Hood to take to her grandmother. When the basket was ready, the little girl put on her red cloak and kissed her mother goodbye.
"Remember, go straight to Grandma's house, her mother cautioned. Don't dawdle along the way and please don't talk to strangers! The woods are dangerous.
"Don't worry, mommy, said Little Red Riding Hood, I'll be careful. But when Little Red Riding Hood noticed some lovely flowers in the woods, she forgot her promise to her mother. She picked a few, watched the butterflies flit about for awhile, listened to the frogs croaking and then picked a few more. Little Red Riding Hood was enjoying the warm summer day so much, that she didn't notice a dark shadow approaching out of the forest behind her,...
"Suddenly, the wolf appeared beside her!"
The little children, who gathered around Alicia, gasped in fright as Shadow, who was strangely, and yet cleverly, disguised as a wolf, appeared and growled. The overall tense atmosphere of the book reading session was amplified by V's skillfully ominous violin playing.
"What are you doing out here, little girl? The wolf asked in a voice as friendly as he could muster." Alicia went on as V played the violin.
"I'm on my way to see my Grandma who lives through the forest, near the brook." Avery replied.
"Then she realized how late she was and quickly excused herself, rushing down the path to her Grandma's house." Alicia read. "The wolf, in the meantime, took a shortcut. The wolf, a little out of breath from running, arrived at Grandma's and knocked lightly at the door."
"Oh, thank goodness dear! Come in, come in!" Griffon, who was ridiculously dressed in gingham clothing and a pair of glasses to look like a grandma, acted out as he waited in his makeshift prop bed in one corner of the room. Then, with slight frustration, he whispered, "How the fuck did I end up dressed like this?"
"Ya, stupid chicken!" Nico, who was positioned behind the bed and hidden from the viewers, whispered savagely as she kicked the wooden prop, making Griffon squawk. "Ye're pretendin' to be a grandma, right?!"
"Oh, sheesh! Right! Ah," projecting his voice once more as he made it sound like an elderly woman, he spoke, " ... I was worried sick that somethin' had happened to ya in the forest."
"Said Grandma thinking that the knock was from her granddaughter." Alicia went on. "The wolf let himself in! Poor Granny did not have time to say another word, before the wolf gobbled her up!"
"Watch out, granny goose! The wolf is gonna eat you!" One of the children screamed and pointed as Shadow attacked Griffon and used her powers to swallow the screaming ( and swearing ) demonic bird whole.
"Nice effects!" Complimented one of the parents. "I wonder how they did that,..."
"The wolf let out a satisfied burp, and then poked through Granny's wardrobe to find a nightgown that he liked. He added a frilly sleeping cap, and for good measure, dabbed some of Granny's perfume behind his pointy ears." Alicia read as Shadow did all those things that she just mentioned. "A few minutes later, Red Riding Hood knocked on the door. The wolf jumped into bed and pulled the covers over his nose."
"Who is it?" This time, someone from the faculty was voicing the wolf, and not Alicia, and it sounded suspiciously strange for a female teacher. It almost sounded like someone's husky - voiced middle - aged aunt,...
"It's me, Little Red Riding Hood." Avery acted.
"Oh, how lovely! Do come in, my dear," croaked Shadow.
"When Little Red Riding Hood entered the little cottage, she could scarcely recognize her Grandmother." Alicia read as you and V stopped playing for a while, plunging the whole classroom in silence.
"Grandmother! Your voice sounds so odd. Is something the matter?" Avery asked.
"Oh, I just have touch of a cold." Squeaked Shadow, adding a cough at the end to prove the point.
"But, Grandmother! What big ears you have!" Said Avery, exaggerating each word, as she edged closer to the bed.
"The better to hear you with, my dear." Replied Shadow.
"But, Grandmother! What big eyes you have!"
"The better to see you with, my dear."
"But, Grandmother! What big teeth you have!" Said Avery, making her voice quiver slightly.
"The better to eat you with, my dear!" Roared Shadow and she leapt out of the bed and began to chase Avery, making the little children yell excitedly as you and V began playing once more.
"Help! Wolf!" Avery, who was suppressing her laughter, pretended to cry as she ran around the room away from Shadow, who was doing a pretty good job of being a wolf.
"I'm here!" Nico, who was dressed as the woodsman, appeared from behind the makeshift bed and chased after Shadow. She grabbed the familiar and made her spit out poor Griffon ( now soaked in Shadow's saliva ) who was a bit frazzled by the whole experience, but still in one piece. Fortunately.
"Oh, Grandma, I was so scared!" Avery sobbed. "I'll never speak to strangers or dawdle in the forest ever again."
"There, there, child." Griffon, who still somehow managed to act despite his coughing fits, croaked. "Ye've learned an important lesson. Thank goodness ya shouted loud enough for this fuckin' woodsman to hear ya!"
"Was that fuck just now?" One of the parents whispered.
"No! You must've misheard it." Another answered. "This is a classroom! No one's allowed to swear."
"Oh, you're right! It must be an old English word from the medieval times."
Nico pretended to knock Shadow out with her prop axe and carried her away from the classroom.
"Little Red Riding Hood and her Grandmother had a nice lunch and a long chat." Alicia read. "And they lived happily ever after. The end."
The children and the parents applauded as the characters, along with Alicia, you, and V, all bowed. The book reading session was, then, followed by gift giving, and after that, you were called in front to perform one last thing on the piano.
"Hailing from the uber romantic city that is Paris, the winner of the 73rd annual European piano concours last October," Avery announced proudly. " ... I give to you - my cousin, (Y/N)."
V watched as you shyly took a seat in front of the piano once more and positioned the music sheet in the music rack. Then, with beautiful and skillful fingers, you started playing.
"Twinkle, twinkle, little star, how I wonder what you are." The children excitedly sang as they gathered around you in utter curiosity as you played the simple tune.
However, it was anything but. As the music progressed, V found out how complex the piece really was. It was composed by Wolfgang Amadeus Mozart, after all. It looked really difficult, indeed. Despite that, he saw how you smiled as you performed.
He saw how eager and excited you were to play for the children.
And it warmed his heart.
When it was almost time to go, Shadow and Griffon made one selfless and surprising move to serve as petting animals for the children, a Christmas treat courtesy of them.
"Hey, do those creatures kinda look dangerous?" The confused parent from earlier asked.
"Hmm, I don't think so." The parent next to him answered. "They're not biting the kids, anyway."
"Oh, you're right."
"Wait, they're battery operated!" Another parent chimed in.
"How did you know that?"
"Animals can't speak."
"Okay, gentle lads and lasses, one hug at a time!" Griffon announced, trying to be heard amidst little, excited voices and numerous, itty bitty hands. "Ouch! Don't pull a tail feather! Sheesh, calm down! I'm not a Thanksgiving turkey!"
"Did you tell them to do that?" You asked V as you watched the scene with total interest.
"Hmm, actually, no." V answered as he savored this moment to be close to you.
"Such a good child." That husky middle - aged aunt voice from earlier spoke, startling both you and V.
"Who was that?" V, who was still looking at the scene before him, asked as he crossed his arms and knitted his eyebrows.
"I have no idea." You answered. You were just as baffled as him with this whole mystery voice thing that was using Shadow as a -
"I have never been hugged by master V before!"
V's eyes darted to his familiars just in time when he saw one little girl hugging Shadow like she was a huge stuffed animal.
"So soft and cuddly!" The little girl said, then kissed Shadow on the forehead. "Thank you so much, big kitty!"
"Why, thank you, little girl." The mysterious voice answered. "And Merry Christmas to you, darling."
"My turn to hug the big kitty!" The little boy, who recited Blake earlier, came forward and engulfed Shadow in a bear hug.
"Oh! And Merry Christmas to you, too, little lad." The voice greeted just in time when V saw something tied around Shadow's neck - a red ribbon with a little, golden bell dangling from it like a dog tag. "My master is truly pleased with your William Blake recital."
Shadow's voice acting earlier,...
The voice greeting the children,...
That little bell dangling from the red ribbon tied around Shadow's neck,...
Could it mean,...
Could it be - ?!
Is it even possible?!
***
❄ Special thanks to @la-vita for suggesting the Christmas Goose Dish. ❄
❄ @clevermentalitybeliever , @v-vic , and @birdgirl69 .❄
***
❄❄❄
***
28 notes
·
View notes
Photo


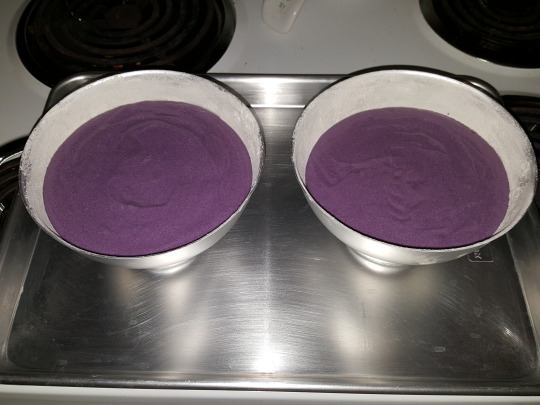
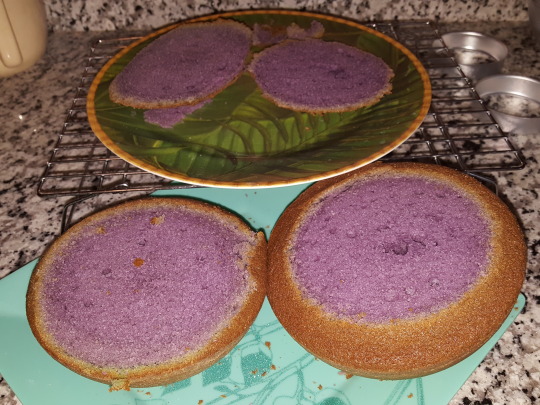
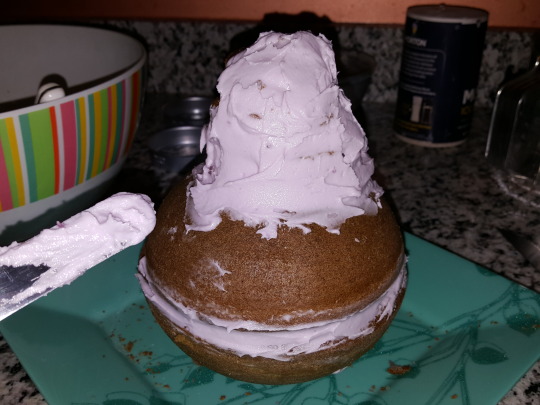

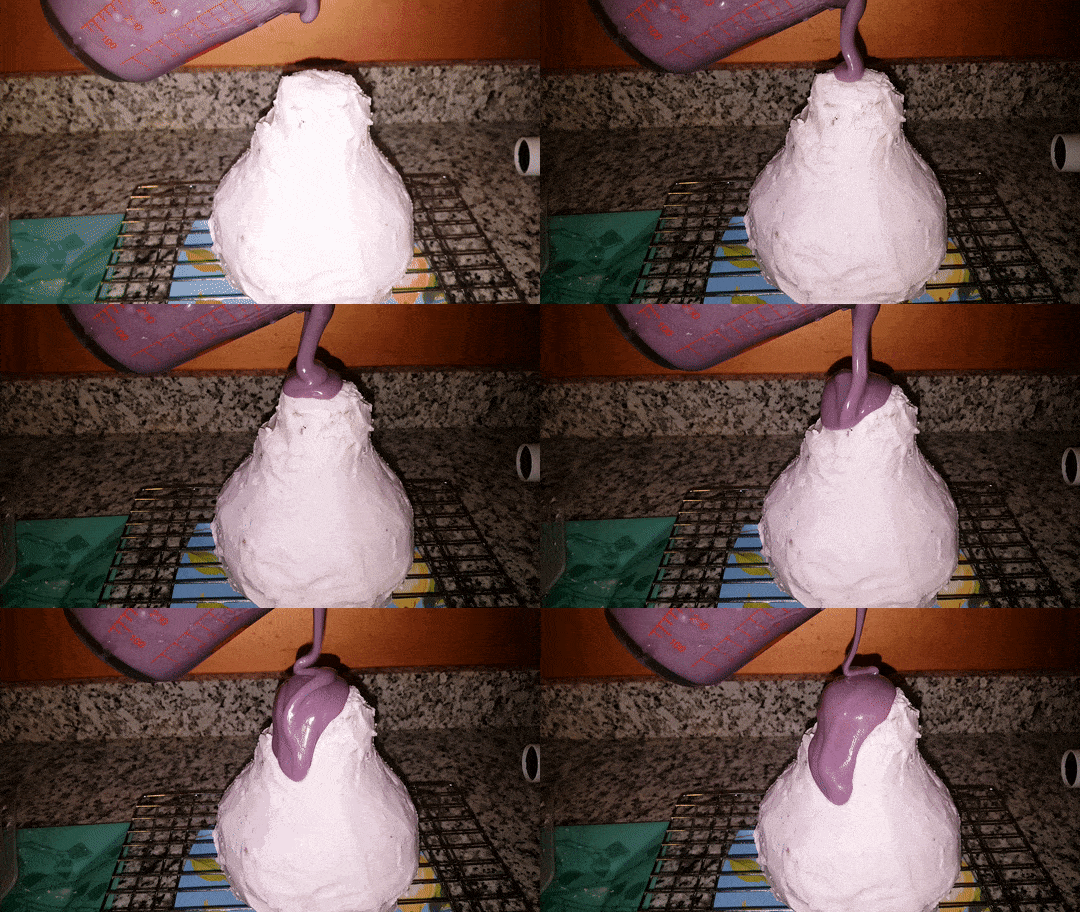

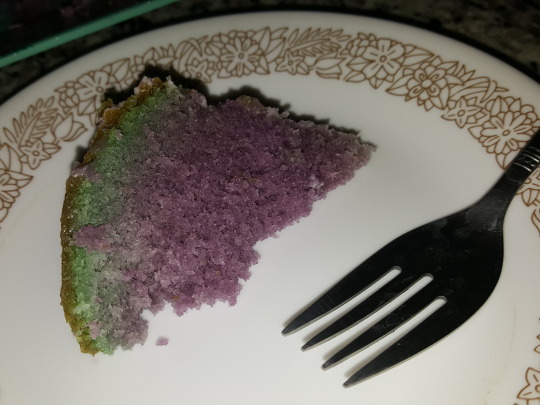
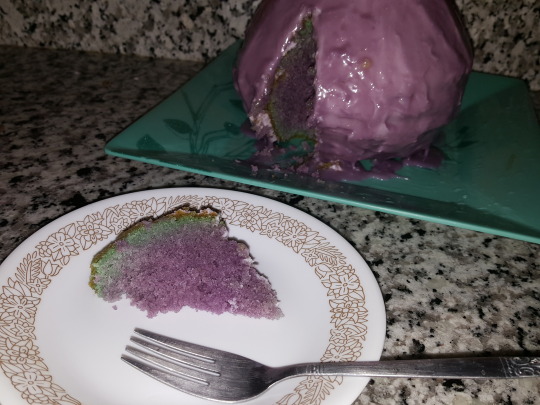
Moon Fruit from the Jungle Moon!
If you’ve ever wanted to eat one of those weird pear-shaped purple fruits Stevonnie scores in “Jungle Moon,” try making this ridiculous cake! No food coloring involved. Tastes sort of fruity and includes ube and sugar plum essence.
Nom.
Recipe below. (I invented this!)
See more SU food tutorials!
Okay! Ever want to eat that juicy, delicious-looking MOON FRUIT that Stevonnie chomps on during their adventures in "Jungle Moon"?

I mean, the normal answer is "no, I never thought of that, you bizarre person."
But if you are one of the few and the proud who is responding with an abnormal answer that sounds something like "yes, that looks delicious," I'm going to teach you how to make it!
As a CAKE!

Large fruit replicas from this show are not new to me. In fact, I made a giant strawberry cake in a previous recipe blog! For this mysterious fruit, I took similar inspiration regarding the desire to cook it to taste like what it looks like; as in, for the strawberry, I cooked actual strawberries into the cake.
But! For this mysterious fruit we have no idea what it is!
So I get to improvise!
The shape of it is sort of pear-like, even though it is purple. I decided why not make it taste like a plum? It is a little plum-like in color and apparent texture. But I also wanted it to taste kind of unusual, like a food on another world obviously would, so I decided to also incorporate natural purple coloring using my leftover ube extract from that time I made Lars's ube roll! Which should combine with plum for an INTERESTING flavor!
There are three parts to this cake. The cake; the foundation frosting; and the mirror glaze for that nice slick pear skin look!
PART ONE: CAKE
Ingredients:
2 and 1/4 cups all purpose flour
2 and 1/2 teaspoons baking powder
1/2 teaspoon baking soda
1 teaspoon salt
1/2 cup (1 stick) unsalted butter, softened to room temperature
1 and 1/2 cups granulated sugar
3 large eggs, room temperature
1/4 teaspoon sugar plum flavoring
1 3/4 teaspoons ube extract
1 cup buttermilk (I use powdered, reconstituted)
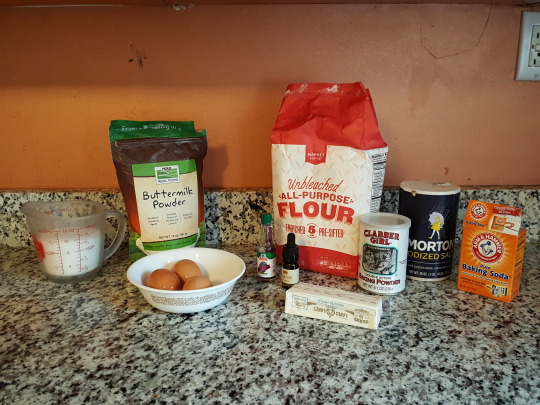
You will also need a few unusual items for this cake. Most notably: spherical cake pans! Mine is a 6-inch diameter sports ball cake pan I bought just for this recipe.
Instructions:
Preheat the oven to 350ºF / 175ºC.
In a medium bowl, whisk together the dry ingredients: the flour, baking powder, baking soda, and salt. Set that aside for now.
Then take a large bowl and whip the butter and sugar together until it's light and fluffy. Once you've got a nice light texture, start beating in the eggs, one at a time, until fully incorporated. Finally, beat in two extracts.
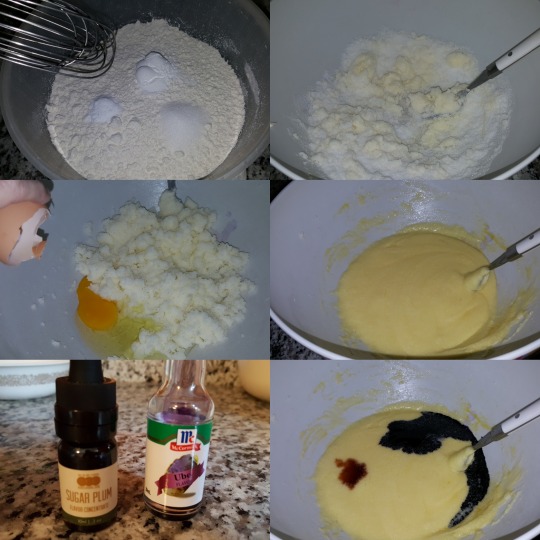
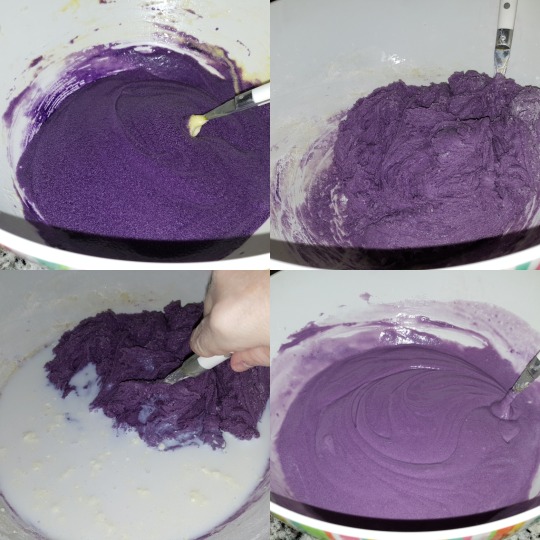
At this point, add in the dry ingredients slowly (add a little, stir, add a little, stir). Don't whip it up too much; just stir it all in. Then add the buttermilk and keep stirring it until you get a nice even mixture. It will seem really soupy and weird at first but I promise, it becomes an even, normal texture cake mix.
Grease and flour the two halves of the spherical cake pan. Greasing and flouring is VITAL because you want to have a smooth surface on your ball cake and you don't want any trouble getting the cake out.
Measure out 2 cups of batter and pour into one half, then measure out 2 cups of batter for the other. With what's left, split it evenly between the two halves as well as you can; I ended up with about 2 1/2 cups of batter in each half.
When you've completed the batter division, balance the pans on the rings that should come with them for stability and stick them on a cookie sheet in the oven. Bake for about 45 minutes.
This cake took WAY longer to bake than I was told to expect based on the recipe and the pan instructions, so I recommend beginning to check for consistency with a toothpick around 30 minutes. (A toothpick should come out clean from the center, and poke it down there really good.) It's okay if the outside browns. It's still purple inside (and usually a little green because ube does that for some reason).
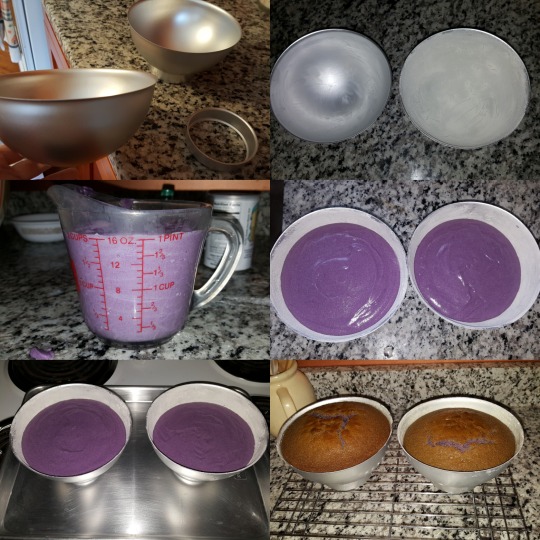
You should let the spherical cakes cool in their pans on a wire rack until they are COMPLETELY cool. While you wait for them to be cool, you can get your frosting ready!
PART TWO: FOUNDATION FROSTING
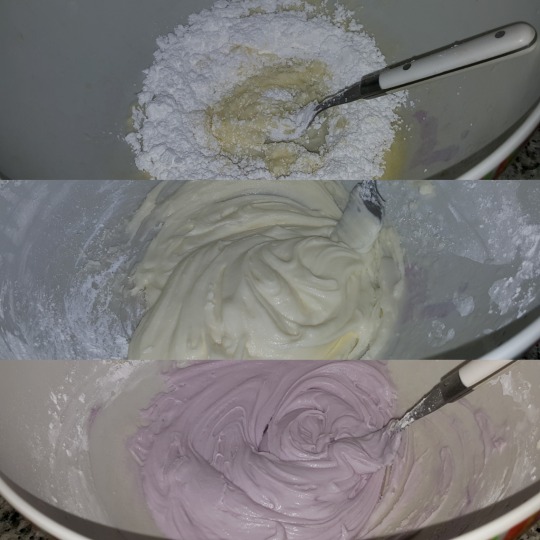
This is basically a typical buttercream with ube extract in it to turn it light lavender. If you have a recipe you prefer for this, feel free to use it, but this is my recipe.
Ingredients:
1/2 cup (1 stick) unsalted butter, room temperature
2 cups powdered sugar
1/8 tsp salt
1/2 tbsp almond milk
1/4 tsp ube extract
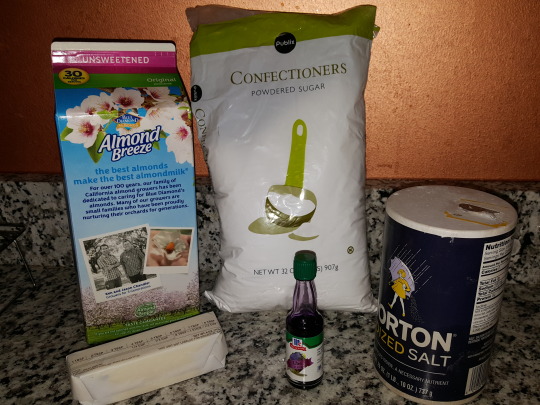
Instructions:
Take the butter and whip it. Then start adding in the powdered sugar. I prefer to sift the powdered sugar before I add. Only whip in half a cup at a time. Every time you add one cup of sugar, add a tiny splash of your pre-measured milk.
Once it’s whipped all together, you can add in the ube flavor and salt and stir it up. This may seem too runny, and if it does you can either add a tad more sugar or refrigerate it. If it seems a tad too thick you can add a splash more milk.
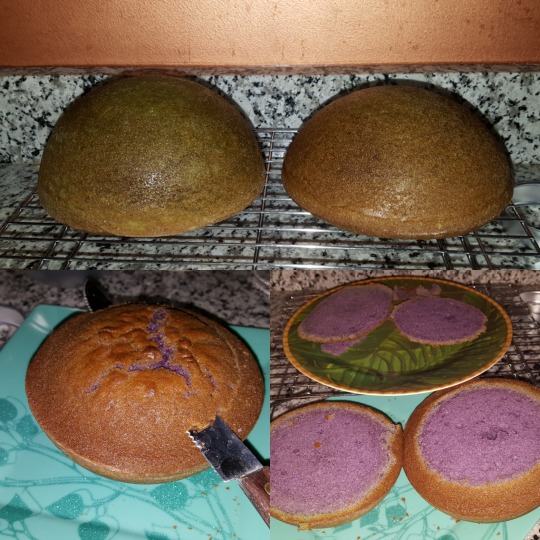
Once your cake is TOTALLY COOLED, you can work with it. Turn the cake out onto the wire racks and level them--meaning, you should take a serrated knife and chop off the parts of the cakes that rose in a dome at the place where it's supposed to be the flat center of the ball cake.
Do not discard these! You need them later, so keep them in one piece on a plate on the side!
Use the foundation frosting to glue the two halves of the cake together. You don't need to chop off the bottom of the sphere to make it stable; it seems to squish itself enough to hold steady and not roll around.
Once you have a cute ball, take your cast-offs from the leveling process and use three different biscuit cutters to make a little tower of cake cutouts. Use frosting to stack them on top of your cake. Weird, eh?
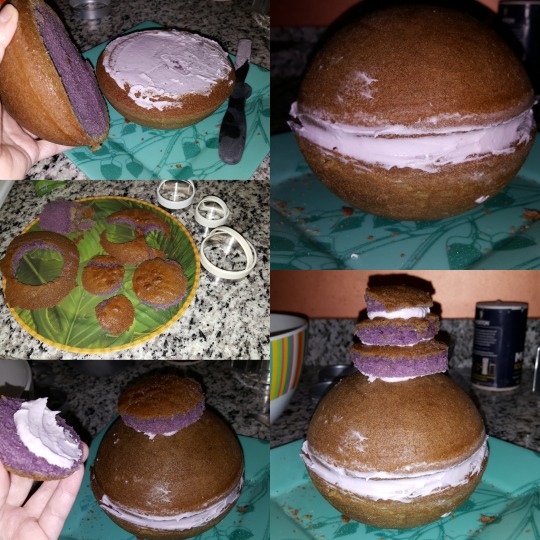
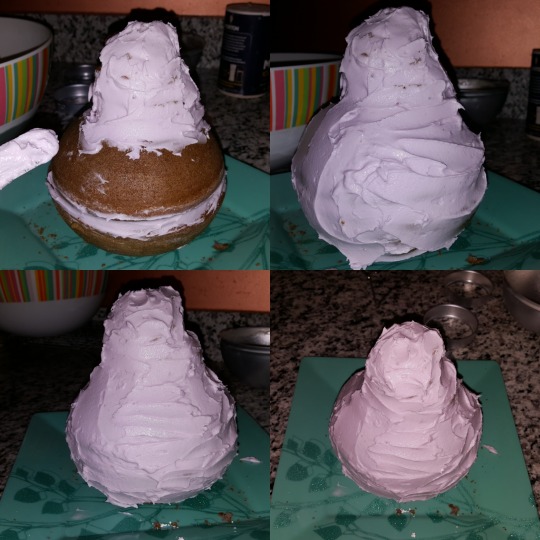
Then begin using the remainder of the foundation frosting to frost the whole cake. You should have just enough.
Work carefully to smooth the frosting, especially at the top where you have uneven, stair-like surface. Frosting will help give the illusion that it is smooth under there, but it takes some work.
And once you have it all frosted, this is important: REFRIGERATE YOUR CAKE! That will help the frosting become like a skin--more firm and will hold up well to the last thing you're going to do to it.
PART THREE: MIRROR GLAZE
Mirror glaze is a type of icing that is designed to pour like syrup and give a reflective, beautiful, mirror-like sheen to a cake.
The trouble I have with mirror glaze is that it usually uses gelatin and that isn't vegetarian, so I have to use a vegetarian alternative. Veg alternatives are not quite as shiny and reflective, but this will do very well for our fruit!
Ingredients:
1/2 cup milk or almond milk
1/8 cup sugar
1 cup buttermilk powder
2 tbsp unsalted butter
1/2 tsp vanilla
2 tsp agar-agar
1/3 cup water
2/3 cup light corn syrup
Another 2/3 cup sugar
150 grams white chocolate (I used chips)
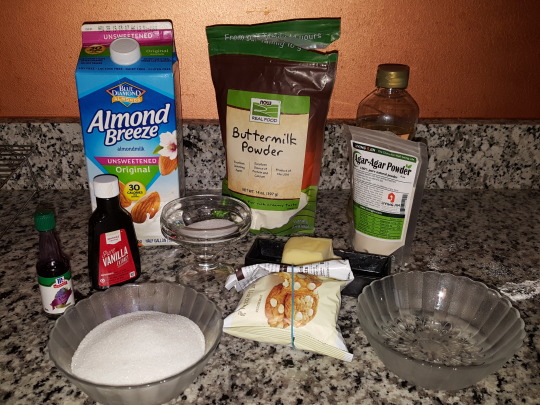
First, some of these ingredients will get cooked into a "condensed milk."
If you would rather buy your own condensed milk in a can, you can ignore the first 5 ingredients of the list, but some people don't have condensed milk where they live or it's really expensive, so I'm just doing a version where we make our own.
(Uh, I also . . . forgot to buy some and realized it after I was way advanced in this recipe. Whoops.)
Instructions:
Place the milk or almond milk in a saucepan and heat on medium high until it almost reaches a boil. Then add the sugar and stir until it dissolves. Once it's dissolved, sift in the milk powder, stirring with a whisk to attack the lumps.
Once the powder is smoothly incorporated, add the butter and the vanilla. Turn the temperature to low and stir for about a minute or two until it almost boils again. Then remove it from the heat and let it cool completely. If you have lumps, you can strain it to get them out. It will thicken more once it's cooled. Measure out half a cup of it to use in this recipe.
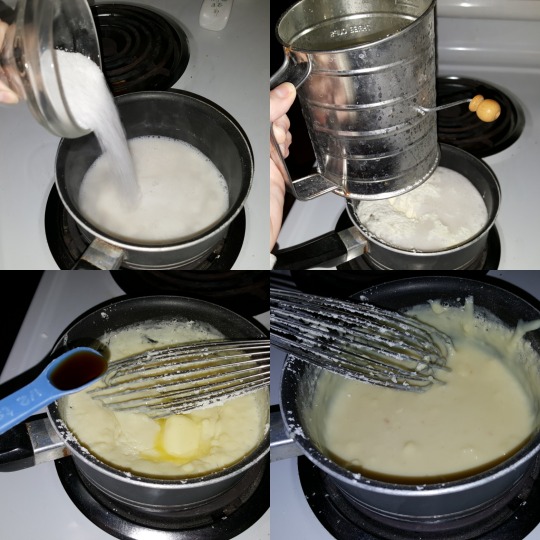
Then make the shiny glaze:
Instructions:
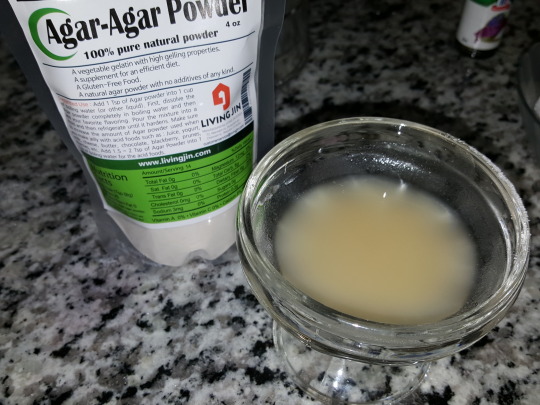
Measure out your 1/3 cup of water and then dump a little bit of it into a very shallow dish. Stir the agar-agar into it and let it sit for about 5 minutes. Agar-agar is a vegetable-based gelatin type thing and it will do something similar to gelatin: it will thicken this syrup.
In a heavy saucepan, add your corn syrup, sugar, condensed milk, and remaining water. Let it come to a boil over medium heat. Once the sugar has dissolved and the mix is at a slow boil, take it off the heat. Let it stop boiling and rest for a moment before adding the white chocolate. The chocolate should melt. Finally, add the agar-agar mix.
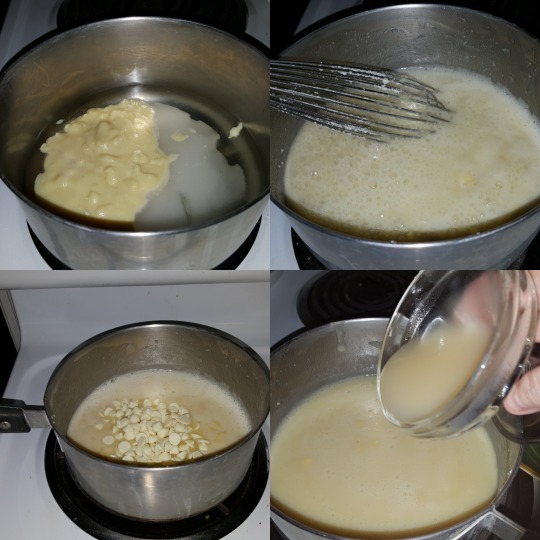
If you want to strain the glaze to get any lumps you see, you can do that here.
I very strongly recommend straining the mixture.
I think most of the lumps in mine came from making my own condensed milk, but even if you use store-bought, some white chocolate or agar can cause clumpy CLODS and not incorporate completely. You do NOT want some of these lumps interrupting your perfect sheen! Add a couple drops of ube to turn it purple and let it come to room temperature.
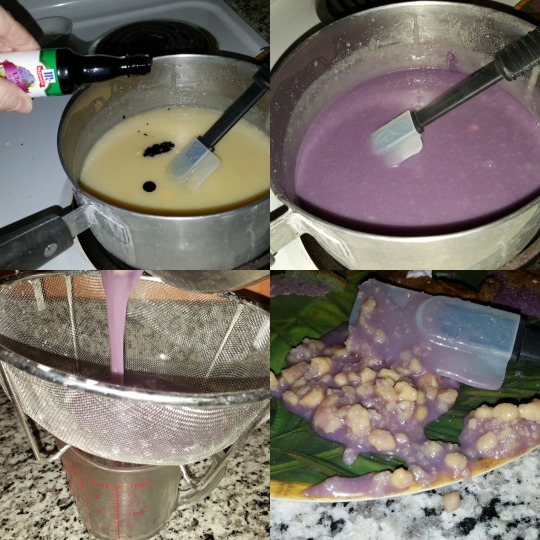
Look at this shiny mirror glaze! It's so pretty!

You absolutely do not want to do this with warm glaze. DO NOT. Even if you think it's fine or that it won't pour properly if it's cold; I assure you, it will pour. It's syrupy. You don't want it to be warm. It will melt your cake frosting and NOT STAY ON THE CAKE.
Listen to me! Cool your glaze!
Next comes the moment of truth: Assembly.
Take the cake out of the fridge. Make sure your glaze is cool as well. Then set the cake on a wire rack and put a catching dish underneath. You will want to catch and reuse this frosting, so make sure you use a broad dish that will be able to catch anything that drips off the cake.
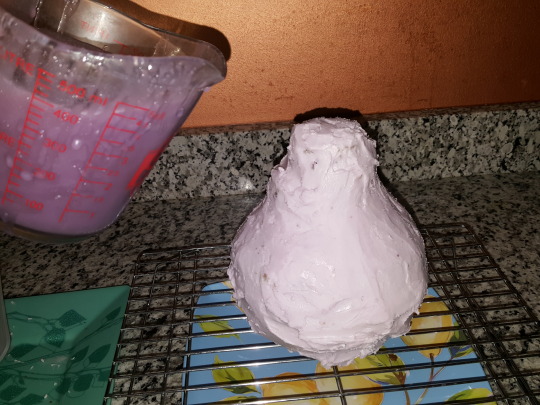
Pour the glaze, starting at the top. Just pour.

Pour an entire coat and then do something weird: Use a hair dryer on cool/low to set the icing and make it shinier.
This is a cool technique I learned for frosting!
Keep pouring new coats onto the cake. It's wonderful! Once you've exhausted your original supply, wait for it to stop dripping for the most part and then switch plates underneath, using what's dripped off the cake as a second coat. I did three coats on my cake.
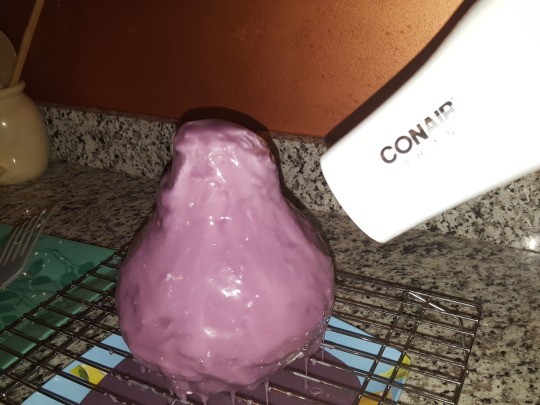
Okay! So now you have a beautiful purple pear Jungle Moon cake. It still needs one thing though. A stem. I used licorice!
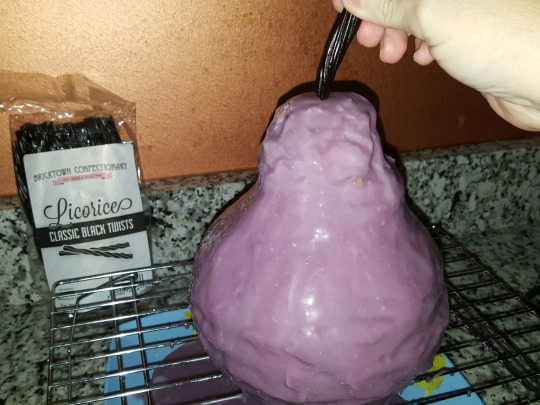
Enjoy your beautiful cake. Shiny purple on the outside and even purple inside, and it tastes like a weird fruit!


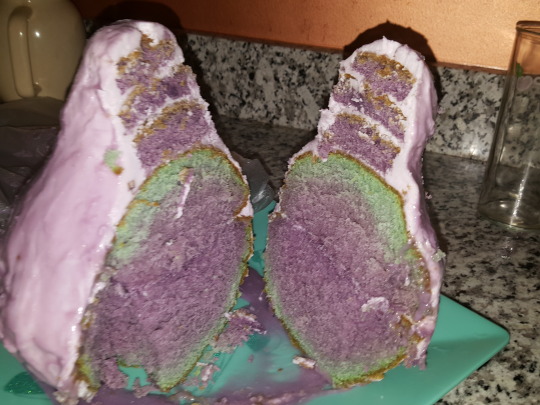
YEAH RECIPES!!! AND YES IT WAS DELICIOUS!!
See more SU food tutorials!
21 notes
·
View notes
Link
Minced Beef and Peppers Pizza. My super special homemade beef mince pepperoni pizza.easy and so quick recipe hope you enjoyed this video#BeefMincePepperoniPizza # #PizzaRecipe. Ground Beef, peppers and onions make this pizza perfect. Enjoy pizza with Ground Beef, onions and peppers in under thirty minutes.
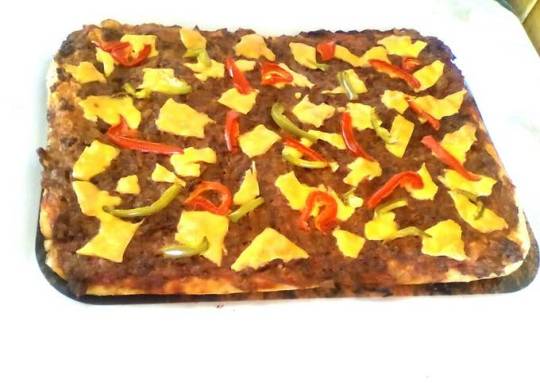
Minced beef stuffed peppers are hearty and delicious, but also perfect if you're looking for a low-carb supper. These mince beef stuffed peppers are filled with onions, mushrooms and flavoured with garlic and thyme. They're also topped with Cheddar cheese, which brings all the ingredients together in a.
Hey everyone, it's Louise, welcome to my recipe site. Today, I will show you a way to make a distinctive dish, minced beef and peppers pizza. It is one of my favorites food recipes. For mine, I am going to make it a little bit unique. This is gonna smell and look delicious.
My super special homemade beef mince pepperoni pizza.easy and so quick recipe hope you enjoyed this video#BeefMincePepperoniPizza # #PizzaRecipe. Ground Beef, peppers and onions make this pizza perfect. Enjoy pizza with Ground Beef, onions and peppers in under thirty minutes.
Minced Beef and Peppers Pizza is one of the most favored of current trending foods in the world. It is easy, it is fast, it tastes yummy. It's appreciated by millions daily. They are fine and they look fantastic. Minced Beef and Peppers Pizza is something which I have loved my whole life.
To begin with this recipe, we have to first prepare a few components. You can cook minced beef and peppers pizza using 17 ingredients and 6 steps. Here is how you cook it.
The ingredients needed to make Minced Beef and Peppers Pizza:
{Take of For the dough.
{Get 3 cups of flour.
{Make ready 1 teaspoon of instant yeast.
{Make ready 1 teaspoon of salt.
{Make ready 2 tablespoons of sugar.
{Make ready of Lukewarm water.
{Prepare of For the filling.
{Make ready 1 kg of Minced beef.
{Make ready 2 of large onions, chopped.
{Take 1 teaspoon of curry powder.
{Prepare 1 teaspoon of crushed garlic and ginger.
{Make ready 1 teaspoon of Portuguese spice.
{Prepare 2 tablespoons of soya mince.
{Get a dash of of Worcester Sauce.
{Get 1 of each of Green and red peppers, cut into strips.
{Prepare 1 cup of grated cheese, I used cheddar cheese slices.
{Take 1/2 cup of tomato sauce or purée.
Pizza is a handmade, flattened dough topped with tomato sauce, cheese, vegetables, proteins, and herbs then baked in an oven. Which kind of meat would you like in the recipe? Spread the tahini onto each pizza base. Divide filling between bases and spread evenly so it covers the whole base.
Steps to make Minced Beef and Peppers Pizza:
Preheat oven to 180 degrees. Put all the dry ingredients for the dough in a bowl and mix well. Pour in water, a little at a time and mix well. Keep kneading for about 10-15 minutes into a nice firm dough but mustn't be hard. Cover with a plastic bag and place in a warm place to rise..
Meanwhile, place Minced beef in a saucepan and saute over high heat. Add onions, ginger and garlic, and the spices. Stirring and mixing well. Add a little water but don't make it too watery. Finish off by adding Worcester Sauce, soya mince and simmer. Then let it cool..
Once risen, divide the dough into two. Roll out one half of the dough on a floured surface with a rolling pin making a rectangular shape, cut out to the size of your baking tray. Place dough in the baking tray and spread a thin layer of tomato sauce or purée..
Spread the thick layer of cool Minced beef all over the dough, followed by a layer of cheese, and finally sprinkle with the peppers..
Repeat with the other half of the dough..
Bake for 30 minutes..
Place the minced beef, chili flakes and dried oregano in a frying pan and cook over a high heat, until the beef is completely browned. Italian Beef and Pepper Pizza-Pre-make pizza crust topped with marinara sauce, peppers, onions, and provolone cheese. Chunks of the juicy Italian beef went on next. Red Chile Paste (or A Few Dashes Red Chile Oil). Place sliced beef in the mixture and toss to coat.
So that's going to wrap this up for this exceptional food minced beef and peppers pizza recipe. Thank you very much for reading. I'm sure you can make this at home. There's gonna be more interesting food at home recipes coming up. Don't forget to save this page on your browser, and share it to your loved ones, colleague and friends. Thank you for reading. Go on get cooking!
0 notes
Photo


The Great Cookie Exchange 2k17: White Chocolate Cheesecake Cupcakes!
(lightly sweet with a delightful burst of tart, surprisingly easy to make! feat. Oreo cookie crust, stabilized whipped cream frosting, sugared cranberries, and white chocolate Christmas trees covered in edible glitter!)
Thanks to @chocolatequeennk for coming up with the cookie exchange idea, and thanks to @goingtothetardis for convincing me I could try my hand at cheesecake and it wouldn’t be a horrible disaster! :D To be fair, though, one of my favorite things about this dessert is that, while it is time-consuming and dirties a fair number of dishes, the steps themselves are actually pretty darn easy! I cobbled the dessert together out of several recipes I found online (sources below) for the sake of bringing something a lil different to my office holiday party yesterday; they were super effing popular and I received a truckload of nice comments. So if you a) are picky about sweets b) like cheesecake c) are interested in making seasonal/holiday treats that are pleasantly nondenominational (not into Christmas? Then those are wintery holiday trees!) and d) want for people to heap compliments on you, make this recipe, my buddies, my guys. <3 <3 <3
I would highly recommend making them with a friend, mostly because baking is so much fun when you do it with company. :D
The Recipes (AKA What is, How do???)
I would recommend starting with the sugared cranberries (source recipe here), and I would recommend making them a day in advance. Here’s my altered version of the aforementioned recipe:
4.5 cups sugar (3 for simple syrup, 1.5 for coating (or more if needed)) 1.5 cups water 2 cups fresh cranberries
First, make a simple syrup by stirring together your water and 4 c. of sugar in a medium saucepan over medium-low heat until the sugar dissolves and the water comes to a boil. Keep stirring and boiling until the mixture goes from opaque to transparent and has a slightly thicker texture when you lift your spoon out--like a thin syrup.

Remove the syrup from heat and let cool for a few minutes, then pour over cranberries in a bowl. The cranberries need to sit in the simple syrup for a minimum of 4 hours, but I would recommend letting them sit overnight, stirring occasionally.
4 hours later/the next day, drain the cranberries from the simple syrup, pour your remaining 1.5 c of sugar into a bowl, and coat the berries in handful-sized batches, rolling them around in the sugar-bowl with a fork until they’re evenly coated all over. (You might end up needing more sugar, since it starts to stick together and refuses to get coat-y after a while.) Place sugared cranberries on a baking sheet lined with parchment paper or wax paper and let dry for at least two more hours, and, voila! You’ve got lovely sugared cranberries!
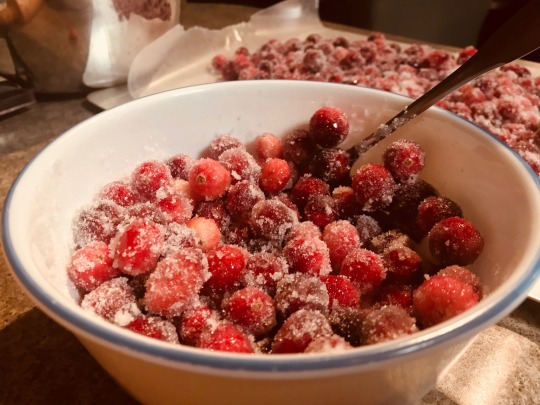
Next up--or perhaps more accurately, simultaneously up--is the white chocolate Christmas trees, if such a thing interests you! The cupcakes are just as good with or without, tbh. I would recommend using Ghirardelli’s white chocolate melting wafers--they melt more evenly than white chocolate chips (significantly less risk of scalding), they hold their shape better than the chips, and they’re just so much effing tastier than any other candymaking chocolate I’ve had. The total amount you need depends on how many trees you want to make, but I can tell you off the bat that a 10 oz pkg of the Ghirardelli will make about 20-24 of the trees I made. (Srsly the Ghir’s are just so yummy, especially tasty while melted--dip some pretzels in the leftover melty goo, nom nom nom such a good treat!!!)
You can use pretty much any Christmas tree candymaking mold of your choice; I used this one. I also recommend using disco dust if you’re in an edible glitter mood. (I would ONLY buy either the original Disco Dust or the Sunflower Sugar Art variety--others will claim to be the same but many of them are actually regular craft glitter repackaged as “technically nontoxic glitter” for cake-PROP-decorating purposes. Boo!!!)
While your simple syrup for the cranberries is cooling, sprinkle a little bit of your edible glitter in the cavities of your candymaking molds by dipping a (clean, dry) index fingertip in the glitter and rubbing your thumb and forefinger together over the cavities so the glitter falls in. (You’re gonna get glitter everywhere no matter what; I’m sorry in advance.) Melt a handful or two of your white chocolate wafers in a microwave-safe bowl, in intervals of 30 seconds at 50% power, stirring between each session. When the white chocolate is smooth and liquidy enough to pour (no more chunks!!!), pour it into the molds, doing your best not to overflow. When each cavity is filled, gently tap and wriggle the mold--this distributes the chocolate more smoothly and also helps to eliminate pesky air bubbles. Stick the mold in the freezer for 15-20 minutes. When removing, check to make sure the chocolate is pulling away from the edges of the mold--that means it’s ready to come out. Turn the mold over on a plate or piece of wax paper and gently shake and tap the mold until the chocolate falls out.
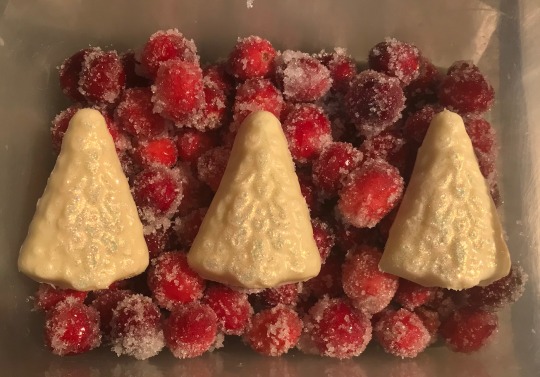
If your chocolate overflowed out of the mold, it might be a little more difficult to get out, and you might have to trim it with a sharp knife afterward. Just use extreme caution, puhleeeeze
And now it’s time for the big to-do: the cheesecake cupcakes! You can also make these a day or two in advance, if you like--they refrigerate quite well! The recipe makes about 16 regular-size cupcakes, or at least that’s how it turned out for me.
The original recipe is here (just disregard the section on the raspberry stuff); my personal tips follow:
- DON’T OVERBEAT THE CUSTARD. Only beat it until it is just blended. Aka, use a hand- or stand-mixer, but with extreme prejudice. Over-beating makes the custard more likely to crack in the oven. Not that that happened to me, or anything... 0:) (Don’t worry tho, even if they do crack, you can just hide it with delicious toppings! They’re still tasty!)
- I would almost always recommend buying store brand cream cheese over Philadelphia. The flavor is richer and they’re easier to soften.
- A quick and fairly easy way to soften the cream cheese? Stick the still-wrapped blocks in your bra/cami/back pants pockets while you’re working on the other stuff. #noshame
- When crushing the Oreos, definitely remove the filling, like the recipe suggests. You might be tempted not to, for the sake of saving time, but since I tried it both ways, I now know that the filling makes the Oreos more difficult to crush, since it makes the cookie bits stick together more. Additionally, if you don’t have a food processor and need to crush the cookies the manual way (it meeeeee), put the cookies in a baggie (be sure to squish out all the air before sealing!!!), lay them down on an old towel, place another towel over the baggie, and go to town with a rolling pin. The towels protect your surfaces from getting bashed and make the sounds a lot easier on the ear!
- If you’re making regular-sized cupcakes (as opposed to minis, like the recipe indicates), you’ll want to scoop a tablespoon of cookie crust into each cup and pack it down; on top of that, spoon custard into each cup until it’s about 3/4 full. (The cakes will puff up while baking and then sink after, or at least, that’s my experience.) I had the best luck baking the cupcakes on a lower shelf in the oven, at 325 degrees, for 15-20 minutes. They’re done when the outsides are set and the middle is still a little jiggly, or when you touch them and the batter no longer sticks to your fingers (they’ll be just a lil springy to the touch).
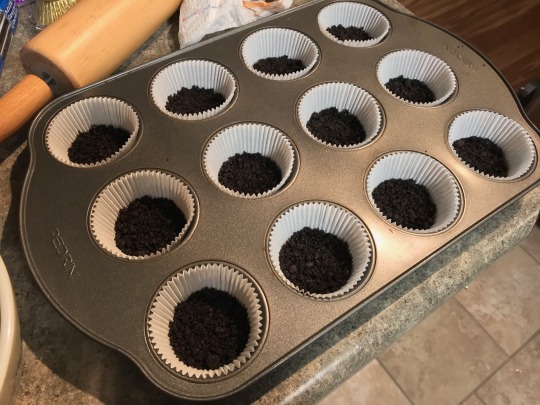
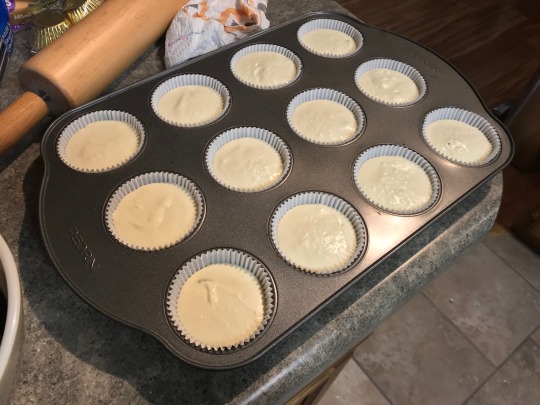
I don’t have pictures of the baked cupcakes, for reasons...? But hey this is what the batter looks like! :’D
While the cupcakes are cooling, you can make the stabilized whipped cream!
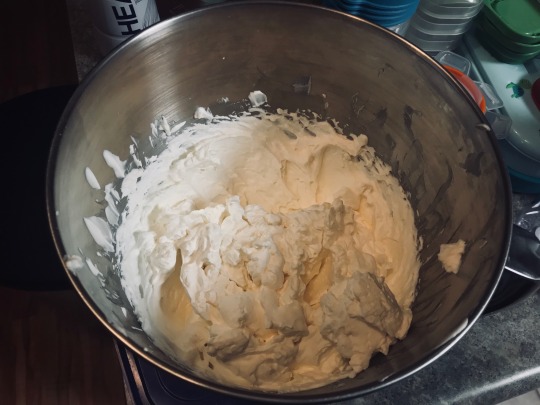
It so tastyyyyyyyyyyy, sigh. And unlike regular whipped cream, which collapses on itself like a delicious but dying star after a couple hours, this shit holds the fuck up! Like seriously I made it days ago and it’s still truckin’. Find the recipe here!
Once everything is set/cooled/etc. (i.e., the candy is out of the molds, the cranberries have formed a semihard sugar shell, and the cupcakes are cool to the touch), it’s time to start pipin’ and decoratin’! I used a small open-star frosting tip to pipe the whipped cream onto my cupcakes, making a small swirly circle in the middle and then little dollop stars around the outside.
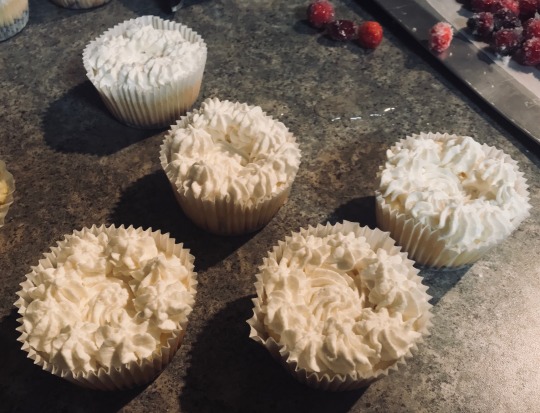
Then I dropped several sugared cranberries on some of the cupcakes (in the center, atop the nice lower swirly bit), and for others, I nestled a tree right smack dab in the middle, using cranberries in the front and back to prop it up (and add that delightful little burst of color/flavor!).
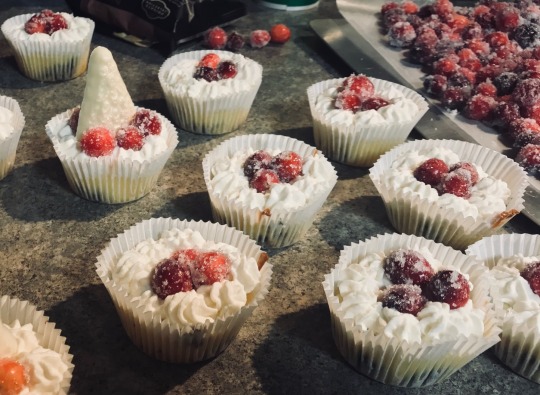
Anyway, that’s about it! Just make sure you have a tall enough container to store the tree-cupcakes in, keep them all refrigerated while you’re not eating, and voila! Delicious fancy fairly-easy-if-a-bit-time-consuming cheesecake cupcakes are yours to share as you please! Or don’t. They are shockingly easy to eat.

Thanks and have a happy holiday!!! <3 <3 <3
#great cookie exchange#with cupcakes!!!#cheesecake cupcakes#white chocolate cupcakes#christmas cupcakes#mbb bakes#cuppitycakes#kitchen witchery
25 notes
·
View notes
Text
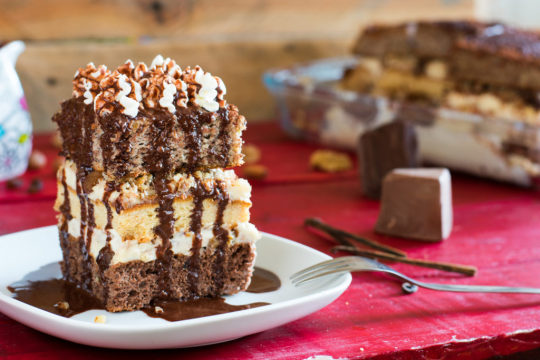
Trifle Recipe
Making trifles doesn’t require much skill or patience let alone time to whip up something delicious in no time at all but this is exclusively different.
As I lately have a little time, I had been searching on the web a few days ago. On the lookout for fresh, interesting ideas, inspiring meals that I have never used before, to astonish my family with. Hunting for a while unfortunately couldn’t find lots of interesting stuff. Just before I thought to give up on it, I came upon this delicious and easy dessert by chance. It seemed so delicious on its pic, it called for urgent action.
It absolutely was easy to imagine how it is created, its taste and how much my husband will probably enjoy it. Mind you, it is quite easy to keep happy the guy in terms of puddings. Yes, I’m a lucky one. Or possibly he is.Anyway, I went to the site: Suncakemom and used the comprehensive instuctions which were accompanied by wonderful pictures of the task. It just makes life faster and easier. I could suppose it is a slight effort to shoot photographs down the middle of baking in the kitchen because you normally have sticky hands thus i genuinely appreciate the effort and time she put in for making this post and recipe easily implemented.
That being said I am inspired presenting my very own recipes in a similar way. Thanks for the idea.
I was tweaking the original recipe create it for the taste of my loved ones. I have to tell you that it was an awesome outcome. They enjoyed the taste, the thickness and loved getting a delicacy such as this in the middle of a stressful workweek. They ultimately demanded even more, many more. So the next time I am not going to commit the same mistake. I’m likely to multiply the volume .
The Trifle Recipe Chocolate originally is from SunCakeMom
Sponge cake:
For detailed instructions check: Sugar free sponge cake
Preheat oven to 350°/180¬°C.
Measure ingredients, mix flour with the baking powder.
Separate eggs and put egg whites into a medium size mixing bowl and the yolks into another mixing bowl.
Beat egg whites until hard peaks form.
Pour agave syrup with the yolks and beat them until light yellow.
Pour in the flour slowly and incorporate well with the yolks.
Fold in egg whites carefully.
Pour batter into the tray and put it in the preheated oven for about 30 minutes or until toothpick comes out clean.
Whilst the first sponge cake is baking prepare the chocolate one with a similar method.
Chocolate sponge cake:
Measure ingredients, mix flour with the unsweetened cocoa powder and the baking powder.
Separate eggs and put egg whites into a medium size mixing bowl and the yolks into another mixing bowl.
Beat egg whites until hard peaks form.
Pour agave syrup with the yolks and beat them until light yellow.
Pour in dry ingredients slowly and incorporate well with the yolks.
Fold in egg whites carefully.
Pour batter into the tray and put it in the preheated oven for about 30 minutes or until toothpick comes out clean.
Nut sponge cake:
Grind nuts of choice.
Measure ingredients, mix flour with ground nuts and baking powder.
Separate eggs and put egg whites into a medium size mixing bowl and the yolks into another mixing bowl.
Beat egg whites until hard peaks form.
Pour agave syrup with the yolks and beat them until light yellow.
Pour in the flour slowly and incorporate well with the yolks.
Fold in egg whites carefully.
Pour batter into the tray and put it in the preheated oven for about 30 minutes or until toothpick comes out clean.
Filling:
Pour rum aroma or rum into water and mix.
Soak raisins in it.
Grind nuts to get ready as fillings.
Vanilla cream:
Whisk yolks with agave syrup until light yellow.
Spoon in corn starch as well and mix them together evenly.
Pour yolk mixture into the simmering milk.
Stir it until it starts bubbling.
Take it off the heat to cool down.
Chocolate syrup:
Break chocolate into little pieces and put it in a small saucepan.
Pour hot water, rum aroma and spoon cocoa powder into the saucepan as well.
Put it on medium heat and stir frequently until chocolate melts and incorporates well with the rest of the ingredients.
Leave syrup cool down.
Assembly:
Put one layer of the cake at the bottom of the tray where it is going to be assembled.
Divide the vanilla cream, raisins and ground nuts into two equal parts.
Spread one part of the vanilla cream evenly on the first cake layer.
Sprinkle half of the nuts and half of the raisins evenly on top as well.
Put second layer of the cake on top.
Repeat spreading the other half of the vanilla cream and sprinkling raisins and nuts on top of the vanilla cream.
Place the third layer on then spread apricot jam on top.
Through a sieve sprinkle cocoa powder on top to finish it.
Put tray in the fridge for a couple of hours to rest.
Serving:
Cut cake into cube shapes and put one cube on a dessert plate.
Decorate it with whipped cream and chocolate syrup on top.
0 notes
Text
Stamped Christmas Cookies: Brown Butter Muscovado
<![CDATA[ .tasty-recipes-quick-links text-align:center; .tasty-recipes-quick-links a padding: 0.5rem; ]]>
When it comes to cookies, I shy away from anything that looks too complicated, anything that might require a piping bag or a frosting tip, anything with ornate detail. But when I saw a photo of an embossed sugar cookie, lightly glazed, looking like a frosted snowflake in Rebecca Firth’s The Cookie Book, I read on.
Rebecca had been inspired by the stamped molasses cookie in Yotam Ottolenghi and Helen Goh’s Sweet and wanted to create something similar but with a different flavor profile. She went the brown butter, muscovado sugar route and loaded it with holiday spices: cinnamon, allspice, cloves, ginger, and cardamom. Spiced. Brown. Butter. As Ina says: How bad can that be?
I immediately ordered a set of cookie stamps, and before I knew it, I was browning butter, rolling out dough, and stamping away. As noted above, this sort of thing is a little out of my comfort zone, but with Rebecca’s detailed notes, I felt I had her by my side, encouraging me when things felt especially unfamiliar.
For instance, when it came time to pack the dough into a disc, she says: “Typically sugar cookie dough needs a light hand. Not this dough. You’ll need to almost knead it to get it to adhere together.” There are so many hints like this throughout the recipe that made navigating the wonderful world of the stamped cookie a little less scary. Plus, all of the ingredients throughout the book are listed in both volume and weight, which I so appreciate more and more.
The verdict: these cookies are as delicious as beautiful, and while I think every kitchen might be a little happier with the addition of a cookie stamp set in its drawers, I would make these cookies again in a second with a simple, round cutter. They are absolutely delicious, spiced perfectly for the season.
Happy Baking, Friends. I hope these cookies make it into your lives sometime soon.
The Cookie Book!
The cookie stamps! Together, I think they would make a nice gift.
Print
<![CDATA[ .tasty-recipes-image float: right; .tasty-recipes-print-button background-color: #666677; display: inline-block; padding-left: 1em; padding-right: 1em; padding-top: 0.5em; padding-bottom: 0.5em; text-decoration: none; a.tasty-recipes-print-button color: #fff; a.tasty-recipes-print-button:hover color: #fff; .tasty-recipes-rating.tasty-recipes-clip-10 -webkit-clip-path: polygon(0 0, 10% 0%, 10% 100%, 0% 100%); clip-path: polygon(0 0, 10% 0%, 10% 100%, 0% 100%); .tasty-recipes-rating.tasty-recipes-clip-20 -webkit-clip-path: polygon(0 0, 20% 0%, 20% 100%, 0% 100%); clip-path: polygon(0 0, 20% 0%, 20% 100%, 0% 100%); .tasty-recipes-rating.tasty-recipes-clip-30 -webkit-clip-path: polygon(0 0, 30% 0%, 30% 100%, 0% 100%); clip-path: polygon(0 0, 30% 0%, 30% 100%, 0% 100%); .tasty-recipes-rating.tasty-recipes-clip-40 -webkit-clip-path: polygon(0 0, 40% 0%, 40% 100%, 0% 100%); clip-path: polygon(0 0, 40% 0%, 40% 100%, 0% 100%); .tasty-recipes-rating.tasty-recipes-clip-50 -webkit-clip-path: polygon(0 0, 50% 0%, 50% 100%, 0% 100%); clip-path: polygon(0 0, 50% 0%, 50% 100%, 0% 100%); .tasty-recipes-rating.tasty-recipes-clip-60 -webkit-clip-path: polygon(0 0, 60% 0%, 60% 100%, 0% 100%); clip-path: polygon(0 0, 60% 0%, 60% 100%, 0% 100%); .tasty-recipes-rating.tasty-recipes-clip-70 -webkit-clip-path: polygon(0 0, 70% 0%, 70% 100%, 0% 100%); clip-path: polygon(0 0, 70% 0%, 70% 100%, 0% 100%); .tasty-recipes-rating.tasty-recipes-clip-80 -webkit-clip-path: polygon(0 0, 80% 0%, 80% 100%, 0% 100%); clip-path: polygon(0 0, 80% 0%, 80% 100%, 0% 100%); .tasty-recipes-rating.tasty-recipes-clip-90 -webkit-clip-path: polygon(0 0, 90% 0%, 90% 100%, 0% 100%); clip-path: polygon(0 0, 90% 0%, 90% 100%, 0% 100%); .tasty-recipes-nutrition ul list-style-type: none; margin: 0; padding: 0; .tasty-recipes-nutrition ul:after display: block; content: ' '; clear: both; .tasty-recipes-nutrition li float: left; margin-right: 1em; .tasty-recipes-plug text-align: center; margin-bottom: 1em; display: -ms-flexbox; display: flex; -ms-flex-align: center; align-items: center; -ms-flex-pack: center; justify-content: center; .tasty-recipes-plug a text-decoration: none; box-shadow: none; .tasty-recipes-plug a img width: 150px; height: auto; margin: 5px 0 0 8px; display: inline-block; @media print .tasty-recipes-no-print, .tasty-recipes-no-print * display: none !important; .tasty-recipes border: 5px solid #666677; margin-top: 6em; margin-bottom: 4em; .tasty-recipes.tasty-recipes-has-plug margin-bottom: 1em; .tasty-recipes-plug margin-bottom: 4em; .tasty-recipes-print-button display: none; .tasty-recipes-image-shim height: 69.5px; clear: both; .tasty-recipes-entry-header background-color: #666677; color: #FFF; text-align: center; padding-top: 35px; padding-bottom: 1.5em; padding-left: 2.5em; padding-right: 2.5em; .tasty-recipes-entry-header.tasty-recipes-has-image padding-top: 0px; .tasty-recipes-entry-header .tasty-recipes-image float: none; text-align: center; transform: translateY(-115px); margin-bottom: 1em; /* Decide if we need this */ .tasty-recipes-entry-header .tasty-recipes-image img -webkit-border-radius: 50%; -moz-border-radius: 50%; border-radius: 50%; border: 5px solid #666677; height: 150px; width: 150px; display: inline-block; .tasty-recipes-entry-header h2 font-size: 2em; font-weight: 400; text-transform: lowercase; margin-bottom: 0; text-align: center; color: #FFF; margin-top: 0; padding-top: 0; padding-bottom: 0; .tasty-recipes-has-image .tasty-recipes-entry-header h2 margin-top: -115px; .tasty-recipes-entry-header hr border: 1px solid #B7BBC6; background-color: #B7BBC6; margin-bottom: 1em; margin-top: 1em; .tasty-recipes-entry-header div.tasty-recipes-rating text-decoration: none; border: none; .tasty-recipes-entry-header .tasty-recipes-rating:hover text-decoration: none; .tasty-recipes-entry-header div.tasty-recipes-rating font-size: 1.375em; display: block; .tasty-recipes-entry-header .tasty-recipes-rating p margin-bottom: 0; .tasty-recipes-entry-header span.tasty-recipes-rating margin-left: .25em; margin-right: .25em; color: #FFF; .tasty-recipes-entry-header .rating-label font-style: italic; color: #B7BBC6; font-size: .6875em; display: block; .tasty-recipes-entry-header .tasty-recipes-details margin-top: 1em; .tasty-recipes-entry-header .tasty-recipes-details ul list-style-type: none; margin: 0; .tasty-recipes-entry-header .tasty-recipes-details ul li display: inline-block; margin-left: .5em; margin-right: .5em; font-size: 1em; line-height: 2.5em; color: #fff; @media only screen and (max-width: 520px) .tasty-recipes-entry-header .tasty-recipes-details .detail-icon height: .8em; margin-top: .4em; .tasty-recipes-entry-header .tasty-recipes-details ul li font-size: .875em; line-height: 1.75em; @media only screen and (min-width: 520px) .tasty-recipes-entry-header .tasty-recipes-details .detail-icon height: 1em; margin-top: .6em; .tasty-recipes-entry-header .tasty-recipes-details ul li font-size: 1em; line-height: 2.5em; .tasty-recipes-entry-header .tasty-recipes-details .tasty-recipes-label font-style: italic; color: #B7BBC6; margin-right: .125em; .tasty-recipes-entry-header .tasty-recipes-details .detail-icon vertical-align: top; margin-right: .2em; display: inline-block; .tasty-recipes-entry-content padding-top: 1.25em; .tasty-recipes-entry-content .tasty-recipes-buttons margin-bottom: 1.25em; margin-left: 1.25em; margin-right: 1.25em; .tasty-recipes-entry-content .tasty-recipes-buttons:after content: " "; display: block; clear: both; .tasty-recipes-entry-content .tasty-recipes-button-wrap width: 50%; display: inline-block; float: left; box-sizing: border-box; .tasty-recipes-entry-content .tasty-recipes-buttons a text-transform: uppercase; text-align: center; display: block; color: #FFF; background-color: #666677; font-size: 1em; line-height: 1.375em; padding-top: 1em; padding-bottom: 1em; font-weight: bold; margin-top: 0; border: none; border-radius: 0; text-decoration: none; .tasty-recipes-entry-content a img box-shadow: none; -webkit-box-shadow: none; .tasty-recipes-entry-content .tasty-recipes-buttons a:hover background-color: #979599; text-decoration: none; .tasty-recipes-entry-content .tasty-recipes-buttons img vertical-align: top; .tasty-recipes-entry-content .tasty-recipes-buttons img.svg-print, .tasty-recipes-entry-content .tasty-recipes-buttons img.svg-pinterest height: 1.25em; margin-right: .375em; margin-bottom: 0; background: none; display: inline-block; @media only screen and (min-width: 520px) .tasty-recipes-entry-content .tasty-recipes-button-wrap:first-child padding-right: .625em; .tasty-recipes-entry-content .tasty-recipes-button-wrap:last-child padding-left: .625em; @media only screen and (max-width: 520px) .tasty-recipes-entry-content .tasty-recipes-button-wrap width: 100%; .tasty-recipes-entry-content .tasty-recipes-button-wrap:nth-child(2) padding-top: 1em; .tasty-recipes-entry-content h3 text-transform: uppercase; font-size: .75em; color: #979599; margin-bottom: 1.5em; .tasty-recipes-entry-content h4 font-size: 1em; padding-top: 0; margin-bottom: 1.5em; margin-top: 1.5em; .tasty-recipes-entry-content hr background-color: #EAE9EB; border: 1px solid #EAE9EB; margin-top: 1em; margin-bottom: 1em; .tasty-recipes-entry-content .tasty-recipes-description, .tasty-recipes-entry-content .tasty-recipes-ingredients, .tasty-recipes-entry-content .tasty-recipes-instructions, .tasty-recipes-entry-content .tasty-recipes-keywords padding-left: 1.25em; padding-right: 1.25em; .tasty-recipes-entry-content .tasty-recipes-description p margin-bottom: 1em; .tasty-recipes-entry-content .tasty-recipes-ingredients ul, .tasty-recipes-entry-content .tasty-recipes-instructions ul list-style-type: none; margin-left: 0; margin-bottom: 1.5em; padding: 0; .tasty-recipes-entry-content .tasty-recipes-ingredients ul li, .tasty-recipes-entry-content .tasty-recipes-instructions ul li margin-bottom: .625em; list-style-type: none; position: relative; margin-left: 2.5em; line-height: 1.46; .tasty-recipes-entry-content .tasty-recipes-ingredients ul li:before, .tasty-recipes-entry-content .tasty-recipes-instructions ul li:before background-color: #666677; -webkit-border-radius: 50%; -moz-border-radius: 50%; border-radius: 50%; height: .5em; width: .5em; display: block; content: " "; left: -1.25em; top: .375em; position: absolute; .tasty-recipes-entry-content .tasty-recipes-ingredients ol, .tasty-recipes-entry-content .tasty-recipes-instructions ol counter-reset:li; margin-left: 0; padding: 0; .tasty-recipes-entry-content .tasty-recipes-ingredients ol li, .tasty-recipes-entry-content .tasty-recipes-instructions ol li list-style-type: none; position: relative; margin-bottom: 1em; margin-left: 2.5em; line-height: 1.46; .tasty-recipes-entry-content .tasty-recipes-ingredients ol li:before, .tasty-recipes-entry-content .tasty-recipes-instructions ol li:before content:counter(li); counter-increment: li; position: absolute; background-color: #666677; -webkit-border-radius: 50%; -moz-border-radius: 50%; border-radius: 50%; height: 1.45em; width: 1.45em; color: #FFF; left: -1.25em; transform: translateX(-50%); line-height: 1.5em; font-size: .6875em; text-align: center; top: .1875em; @media only screen and (max-width: 520px) .tasty-recipes-entry-content .tasty-recipes-ingredients ol, .tasty-recipes-entry-content .tasty-recipes-instructions ol margin-left: 0; .tasty-recipes-entry-content .tasty-recipes-notes padding: 1.25em; background-color: #EDF0F2; .tasty-recipes-entry-content .tasty-recipes-notes ol counter-reset:li; margin-left: 0; padding: 0; .tasty-recipes-entry-content .tasty-recipes-notes ul margin-left: 0; padding: 0; .tasty-recipes-entry-content .tasty-recipes-notes p, .tasty-recipes-entry-content .tasty-recipes-notes ul li, .tasty-recipes-entry-content .tasty-recipes-notes ol li background-color: #FFF; padding-left: 1.5625em; padding-right: 1.5625em; padding-top: 1.25em; padding-bottom: 1.25em; position: relative; -webkit-clip-path: polygon(20px 0, 100% 0, 100% 100%, 0 100%, 0 20px); clip-path: polygon(20px 0, 100% 0, 100% 100%, 0 100%, 0 20px); margin-bottom: 1.5em; @media only screen and (min-width: 520px) .tasty-recipes-entry-content .tasty-recipes-notes p, .tasty-recipes-entry-content .tasty-recipes-notes ul li, .tasty-recipes-entry-content .tasty-recipes-notes ol li padding-left: 2.5em; .tasty-recipes-entry-content .tasty-recipes-notes p:before, .tasty-recipes-entry-content .tasty-recipes-notes ul li:before content: "i"; display: block; background-color: #666677; -webkit-border-radius: 50%; -moz-border-radius: 50%; border-radius: 50%; height: 1.3em; width: 1.3em; font-size: .75em; line-height: 1.3em; text-align: center; color: #FFF; position: absolute; left: 1.167em; top: 1.9em; .tasty-recipes-entry-content .tasty-recipes-notes ol li:before content:counter(li); counter-increment: li; position: absolute; background-color: #666677; -webkit-border-radius: 50%; -moz-border-radius: 50%; border-radius: 50%; height: 1.45em; width: 1.45em; color: #FFF; left: 2em; transform: translateX(-50%); line-height: 1.5em; font-size: .6875em; text-align: center; top: 2em; .tasty-recipes-entry-content .tasty-recipes-notes p:last-child margin-bottom: 0; .tasty-recipes-entry-content .tasty-recipes-keywords background-color: #EDF0F2; padding-bottom: 1em; padding-top: 1em; .tasty-recipes-entry-content .tasty-recipes-keywords p font-size: 0.7em; font-style: italic; color: #979599; margin-bottom: 0; .tasty-recipes-entry-content .tasty-recipes-keywords p span font-weight: bold; .tasty-recipes-nutrifox text-align: center; margin: 0; .nutrifox-label background-color: #EDF0F2; .tasty-recipes-nutrifox iframe width: 100%; display: block; margin: 0; .tasty-recipes-entry-content .tasty-recipes-nutrition padding: 1.25em; color: #666677; .tasty-recipes-nutrition .tasty-recipes-label font-style: italic; color: #B7BBC6; margin-right: .125em; font-weight: 400; .tasty-recipes-nutrition ul text-align: center; .tasty-recipes-nutrition li float: none; display: inline-block; line-height: 2em; .tasty-recipes-entry-footer background-color: #666677; padding-top: 1.5625em; padding-bottom: 1.25em; padding-left: 2.5em; padding-right: 2.5em; text-align: center; .tasty-recipes-entry-footer .tasty-recipes-footer-content display: inline-block; .tasty-recipes-entry-footer img width: 65px; .tasty-recipes-entry-footer h3 color: #B7BBC6; font-size: 1.25em; line-height: 2.25em; margin-top: .5em; margin-bottom: .125em; padding: 0; line-height: 1em; .tasty-recipes-entry-footer p margin-bottom: 0; color: #FFF; font-size: .75em; .tasty-recipes-entry-footer p a color: #FFF; text-decoration: underline; box-shadow: none; border-bottom: none; .tasty-recipes-entry-footer:after content: " "; display: block; clear:both; @media only screen and (max-width: 520px) .tasty-recipes-entry-footer h3 margin-top: .5em; margin-bottom: .5em; .tasty-recipes-entry-footer text-align: center; @media only screen and (min-width: 520px) .tasty-recipes-entry-footer img float: left; .tasty-recipes-entry-footer h3, .tasty-recipes-entry-footer p margin-left: 90px; clear: none; text-align: left; /* Print view styles */ .tasty-recipes-print-view font-size: 11px; background-color: #fff; .tasty-recipes-print-view .tasty-recipes-print-button display: inline-block; .tasty-recipes-print padding:0; font-size: 11px; .tasty-recipes-print-view .tasty-recipes margin-top: 1em; .tasty-recipes-print .tasty-recipes-entry-header background-color: inherit; color: inherit; padding-bottom: 0; padding-left: 1em; padding-right: 1em; padding-top: 1em; .tasty-recipes-print .tasty-recipes-entry-header .tasty-recipes-image float: right; transform: none; .tasty-recipes-print.tasty-recipes-has-image .tasty-recipes-entry-header h2 margin-top: 0; .tasty-recipes-print .tasty-recipes-entry-header h2 color: inherit; margin-bottom: .5em; .tasty-recipes-print .tasty-recipes-entry-header hr display: none; .tasty-recipes-print .tasty-recipes-entry-header span.tasty-recipes-rating color: #000; .tasty-recipes-print .tasty-recipes-entry-header .tasty-recipes-details ul padding: 0; clear: none; .tasty-recipes-print .tasty-recipes-entry-header .tasty-recipes-details ul li line-height: 1.5em; color: #000; .tasty-recipes-print .tasty-recipes-entry-header .tasty-recipes-details .detail-icon display: none; .tasty-recipes-print .tasty-recipes-entry-content img max-width: 50%; height: auto; .tasty-recipes-print .tasty-recipes-entry-content .tasty-recipes-ingredients ul li, .tasty-recipes-print .tasty-recipes-entry-content .tasty-recipes-ingredients ol li margin-bottom: 0.25em; line-height: 1.1; .tasty-recipes-print .tasty-recipes-entry-content .tasty-recipes-instructions ul li, .tasty-recipes-print .tasty-recipes-entry-content .tasty-recipes-instructions ol li margin-bottom: 0.5em; line-height: 1.1; .tasty-recipes-print .tasty-recipes-entry-content .tasty-recipes-ingredients ul li:before, .tasty-recipes-print .tasty-recipes-entry-content .tasty-recipes-instructions ul li:before top: 0.3em; .tasty-recipes-print .tasty-recipes-entry-content .tasty-recipes-ingredients ol li:before, .tasty-recipes-print .tasty-recipes-entry-content .tasty-recipes-instructions ol li:before top: 0; .tasty-recipes-print .tasty-recipes-entry-content .tasty-recipes-notes p, .tasty-recipes-print .tasty-recipes-entry-content .tasty-recipes-notes ul li, .tasty-recipes-print .tasty-recipes-entry-content .tasty-recipes-notes ol li padding-top: 0; padding-bottom: 0; background-color: #EDF0F2; clip-path: none; .tasty-recipes-print .tasty-recipes-entry-content .tasty-recipes-notes p:before, .tasty-recipes-print .tasty-recipes-entry-content .tasty-recipes-notes ul li:before top: 0; clip-path: none; margin-bottom: 0.5em; @media print .tasty-recipes-print .tasty-recipes-entry-footer img display: none; .tasty-recipes-print .tasty-recipes-source-link text-align: center; ]]>
Description
From Rebecca Firth’s The Cookie Book
As noted above, the cookies are worth making even if you don’t have a stamp set, but if you’re interested in purchasing one, this is the one I have: Starry Night Cookie Stamps. And if you’re interested in creating that fluted edge, a set of fluted cookie cutters is nice to have, too — these are great for linzer cookies as well.
Notes:
I couldn’t find muscovado sugar, so I used dark brown sugar.
Making these cookies takes a bit of patience, but Rebecca’s tips and notes throughout the recipe are incredibly helpful. The dough, you will learn, needs to be at the perfect temperature—too cold, the stamp won’t leave a mark; too warm, the dough will stick to the cutter. Once you find your rhythm, the process moves along nicely.
Ingredients
For the cookies:
24 tablespoons (344 g) unsalted butter
1 cup (210 g) dark muscovado sugar, packed or dark brown sugar
½ cup (96 g) granulated sugar
2 large eggs, room temperature
1 tablespoon (15 ml) real vanilla extract
3 cups (408 g) all-purpose flour
1 cup (136 g) bread flour
2 teaspoons (5 g) cinnamon
1 teaspoon allspice
1 teaspoon cloves
1 teaspoon ginger
1 teaspoon sea salt
½ teaspoon cardamom
For the glaze:
2 cups (260 g) powdered sugar
1 tablespoon (15 ml) real maple syrup
½ teaspoon maple extract, optional
4 tablespoons (60 ml) milk, or more to thin
Instructions
To make the cookies, place the butter in a medium heavy-bottomed saucepan and melt over medium heat. (Be sure to use a medium or large pan — the butter foams and boils up during the browning process and will creep over the edge of a pan that is too small.)
Once melted, crank up the heat to medium high, stirring constantly. Small golden bits will start to settle on the bottom of the pan, and it will start to have a nutty aroma. This should take around 3 to 5 minutes. Once this happens, take the pan off of the heat and pour the butter into the bowl of an electric stand mixer fitted with the paddle attachment. Once cooled slightly, add the muscovado and granulated sugar and mix on medium until blended. The mixture will be thick. Add in the eggs, one at a time, making sure to blend completely before adding in the next. Add in the vanilla and mix for 1 minute more. Be sure to break up any large muscovado lumps.
In a large bowl, whisk together the all-purpose flour, bread flour, cinnamon, allspice, cloves, ginger, sea salt and cardamom. Add this to the brown butter mixture and mix on low until the mixture comes together and is no longer crumbs. Separate into two equal halves and pat each mound of dough into a disc. Typically sugar cookie dough needs a light hand. Not this dough. You’ll need to almost knead it to get it to adhere together.
Press any cracks or fissures together.
Place a dough disc between two layers of parchment paper. If you have a silicone baking mat, place it underneath the parchment to keep it from sliding on the counter. Roll the dough to ½-inch (1.3-cm) thickness. Pull the dough with the parchment onto a baking sheet and chill in the freezer for 5 to 10 minutes or in the fridge for 10 to 20 minutes, max. The dough should chill quickly. If at any point the dough starts sticking to the floured cookie stamps, put it back in the freezer for 5 minutes or in the fridge for 10 minutes. Conversely, if it’s too chilled, let it come closer to room temperature to stamp, or it will be too hard—this happened to me, and I had to let it sit at room temperature for about an hour.
Cover several baking sheets with parchment paper.
If using cookie stamps, dip the cookie stamps in some flour and dust off the excess. Evenly press the cookie stamp onto the dough, making sure to press firmly to get the detailed imprint, and then use a fluted, round cutter to cut the cookie from the dough. Grab a spatula to move the cut-out cookie to your prepared baking sheets. Repeat with the remaining cookies. Re-roll scraps as needed.
Preheat the oven to 375°F (190°C) and make sure a rack is in the top third of the oven at least 6 inches (15 cm) from the heat source.
Place the cookies in the freezer for 30 minutes (or longer — I kept them in for 24 hours, and I imagine they would keep longer if stored in an airtight container) and then take them directly from the freezer to the top rack of the oven and bake for 9 minutes. It’s crucial not to overbake these. (Note: my cookies were not quite as tall as 1/2 inch, so they cooked in about 7 minutes — keep an eye on them! If they bake too long, the stamped design becomes less pronounced. They might not look done when you remove them, but they continue to cook as they cool.) Let the cookies cool for 5 minutes on the baking sheet and then transfer to a rack to finish cooling.
To make the glaze, in a small bowl, whisk together the powdered sugar, maple syrup, maple extract, if using, and milk until you have a thin glaze. Place a baking sheet underneath the cooling rack. Dip the cooled cookies into the glaze, letting the excess drip back into the bowl…you want the glaze to be thin enough that you can see the detail from the cookie stamps—I found myself using my finger to wipe off excess glaze; the cookies just need a thin coating. They are delicious without any glaze at all in fact, but the glaze is super pretty. Set the cookies back on the cooling rack to dry completely and serve!
Posted By: alexandra · In: Baking, Christmas, Cookies, Desserts, Fall, Featured, Gifts, Holidays, I need a Cookie, New Year's Eve, winter

Source: https://alexandracooks.com/2018/12/04/stamped-christmas-cookies-brown-butter-muscovado/
0 notes
Text
Yotam Ottolenghi’s party food recipes
Party food, or finger food, is a real chore for the home cook. It’s fiddly, time-consuming and, if I’m honest, pretty dull to make. So, before I pick what to make, I always ask myself a few questions: in the interests of not spending the entire party in the kitchen, is a dish relatively quick? Can any of it be made ahead of time? Will any leftovers double up as brunch or lunch tomorrow? And will my children eat it? If I can tick at least some of those boxes, I’m good to go.
Sweet potato and quinoa fritters
Yotam Ottolenghi’s sweet potato and quinoa fritters. Photograph: Louise Hagger for the Guardian
You can play around with the veg in these, swapping carrots, pumpkin or butternut squash for the potatoes, if you like. Whatever you use, though, don’t leave the fritter mix sitting around for too long once it’s made, otherwise it will go soggy. These are best eaten straight after baking, but they are also good warmed up in a low oven a few hours later, or even the next day.
Prep 10 min Cook 25 min Makes 16
30g black quinoa 1-2 sweet potatoes, peeled and coarsely grated to get 250g 2 small baking potatoes, peeled and coarsely grated to get 250g 1 red onion, peeled and thinly sliced 25g picked coriander leaves, roughly chopped 75g plain flour 2 tbsp cornflour 1 tbsp ground coriander 1 tbsp ground cumin Salt and black pepper 400ml sunflower oil 2 limes, cut into wedges, to serve
Cook the quinoa in plenty of boiling water for 10 minutes, until it is cooked but still has bite. Leave to drain in a sieve, then pat dry to remove as much liquid as possible.
Put both potatoes, the onion, coriander and quinoa in a large bowl and mix well to combine.
In a small bowl, whisk together both flours, the spices, a teaspoon and three-quarters of salt and a good grind of pepper. Slowly whisk in 100ml cold water, until you have a smooth batter.
Heat the oil in a medium saute pan on a medium-high flame.
Tip the batter into the vegetable bowl and mix together well. Using your hands, form the fritter mix into golf ball-sized portions weighing about 50g each, squeezing them very tightly to compact them and extract most of the liquid. Cook the fritters in batches, so as not to overcrowd the pan: carefully drop three or four balls into the hot oil and fry for about four minutes in total, turning them once halfway, until golden-brown and cooked through, then transfer to a plate lined with kitchen paper (if the fritters start browning too quickly, adjust the temperature of the oil as you go). Serve hot with the lime wedges alongside.
Baked polenta and smoked haddock chips
Yotam Ottolenghi’s baked polenta and smoked haddock chips. Photograph: Louise Hagger for the Guardian
This is a fun twist on fish and chips. The polenta can be made and set in the fridge up to a day ahead, ready to be cut into chips and baked.
Prep 10 min Set 1 hr Cook 50 min Makes About 45
750ml whole milk 1 onion, peeled and cut into 8 wedges 1 pinch ground nutmeg 2 bay leaves Salt and black pepper 250g smoked undyed haddock fillets, skinned 3 garlic cloves, peeled and crushed ½ tsp sweet smoked paprika 200g quick-cook polenta 50g unsalted butter, cut into rough 1cm cubes, at room temperature 75g gruyère, coarsely grated 15g tarragon, roughly chopped 20g chives, roughly chopped 20g dill, roughly chopped 3 tbsp olive oil 170g soured cream 1 tbsp capers 1 lemon – zest grated, to get 1 tsp, then juiced, to get 1 tbsp
Line the base and sides of a 30cm x 20cm rimmed baking tray with clingfilm. Put the first four ingredients and a teaspoon and a quarter of salt in a medium saucepan. Cover with a lid and put on a medium-low heat for 20 minutes, stirring occasionally, until steaming and just beginning to bubble. Add the haddock, replace the lid and leave to cook for five minutes, then turn off the heat. Gently lift out the haddock with a slotted spoon and put it in a bowl. Using the back of a fork, break up the fish into small pieces and set aside. Strain the milk through a sieve into a medium saucepan, and discard the solids; you should be left with about 650ml of liquid.
Put the milk pan on a medium-high heat, add the garlic and paprika, and bring to a simmer. Lower the heat to medium, then slowly add the polenta, whisking continuously, until the mixture thickens – about two minutes. Take off the heat and stir in the butter, cheese, tarragon, three-quarters of the chives and dill, the haddock and a good grind of pepper.
Spoon the polenta mix into the prepared baking tray, spreading it out to cover the base and come up the sides by about 1.5cm. Smooth out the top with the back of a spoon, then set aside to firm up for an hour (if you’re making the mix ahead of time, cover the tray and refrigerate overnight).
Heat the oven to 230C/450F/gas 8. Flip the firm polenta out of the tray on to a cutting board, and trim the sides so you have an even rectangle. Cut the block vertically into 1.5cm-thick strips – you should get about 15 strips – then cut again horizontally into thirds, so you end up with 45 or so chips in total; the cutting will be easier if you wipe the knife clean as you go. Transfer the chips to a large oven tray lined with baking paper, spacing them slightly apart, and brush with the oil. Bake for 10 minutes, then flip over each chip and bake for five minutes more, until golden. Leave to cool slightly while you make the sauce.
Combine the soured cream, capers, remaining dill and chives, the lemon juice and zest, a quarter teaspoon of salt and a good grind of pepper, and serve alongside the polenta chips.
Sushi rice cakes with chilli and spring onion dipping sauce
Yotam Ottolenghi’s sushi rice cakes with chilli and spring onion dipping sauce. Photograph: Louise Hagger for the Guardian
Wet your hands to shape the cakes, otherwise things will get very sticky. You can shape them ahead of time and fry at the last minute, if you prefer. And simply omit the chilli from the dipping sauce to make this child-friendly.
Prep 5 min Cook 1 hr 20 min Makes 16
300g sushi rice 60ml rice vinegar 2½ tbsp caster sugar Salt 2 tsp cornflour 2 tbsp groundnut oil 2 tsp sesame oil
For the dipping sauce 2 tbsp soy sauce 2 tbsp mirin 1 spring onion, finely sliced 1 red chilli, deseeded and finely chopped 2 tsp groundnut oil ½ small garlic clove, peeled and finely chopped
Put the rice in a large bowl of cold water and stir with your hands for 10 seconds, to help release the starch. Drain into a large sieve, refresh under cold running water, then return the rice to the bowl. Cover again with cold water and repeat the stirring and draining procedure four or five times, until the water in the bowl is almost clear. Return the drained rice to the bowl, cover with fresh water, leave to soak for 30 minutes, then drain one final time.
Put the drained rice in a medium saucepan, pour on 360ml cold water, cover the pan and bring to a boil. Once boiling, turn down the heat to low and simmer for 15 minutes, without lifting the lid or stirring. Turn off the heat and leave the rice, still covered, to rest for 10 minutes.
Put the vinegar and sugar in a small saucepan with three-quarters of a teaspoon of salt. Heat gently, just until the sugar dissolves, then pour all over the rice.
Sprinkle the cornflour over the rice and then, using a spatula, very carefully stir the rice, so it’s all coated. Cover the pan again and leave to sit for 15 minutes more.
Meanwhile, make the dipping sauce by mixing all the ingredients.
When you’re ready to shape the cakes, wet your hands and have ready a damp plate to put the cakes on. Take about 100g of the rice mix and form into a roughly 4cm-wide x 2cm-thick cake. Put on the damp plate and repeat with the remaining rice, wetting your hands again between forming each cake. You should end up with 16 cakes.
Put half the groundnut oil and half the sesame oil in a large, nonstick frying pan and turn the heat to medium-high. Once the oil is hot, carefully lay in half the rice cakes and fry for two to three minutes, until the base is golden brown – don’t be tempted to turn them over before they reach this stage, or they may fall apart. Carefully turn each cake, fry for two to three minutes more, then transfer to the damp plate with a slotted spoon and keep warm. Repeat with the remaining oil and rice cakes, then serve warm with the dipping sauce.
Source: https://www.theguardian.com/lifeandstyle/2018/jul/28/yotam-ottolenghi-party-recipes
0 notes
Text
Balsamic Poached Cherry and Goat Cheese Crostini
“Tension translates to your guests. They’ll have a much better time having chili and baked potatoes than they would if you did roast duck with a wild cherry sauce and then had to lie down and cry for a while”. Nigella Lawson
Cherry and Goat Cheese Crostini
Here we have two of my favorites in one tangy, sweet and savory mouthful at the same time. This balsamic poached cherry and goat cheese crostini is often the first appetizer finished and the last spoken about. It’s very easy to make, just pit your cherries, and put them to poach in the balsamic vinegar. While they are poaching, toast your crostini and slather on room temperature goat cheese. Allow the cherry mix to cool enough so it does not melt your cheese. Then top each crostini with a tablespoon of the cherry mix. Using a good cherry pitter makes this an easy bite to put together ahead of time and then serve at room temperature, just store in the fridge until ready to eat. To up the savory aspect, I added a few sprigs of thyme leaves to the balsamic vinegar for poaching the cherries. This adds a dimension to the flavor that you do not see coming. Believe me, one crostini is never enough, so be sure to make enough.
Balsamic and Thyme Poached Cherry Compote
Poaching the cherries in the balsamic vinegar and thyme creates a deliciously, rich syrupy compote that is to die for. The acidity in the balsamic vinegar is just enough to marry the thyme, vinegar and cherry flavors together so that none of these flavor profiles are dominate over the others. You end up with fruit compote that is sweet, tart and savory all at once. Please be sure to poach the cherries on a very low heat to prevent burning the vinegar, stirring occasionally to meld the flavors together.
Build Your Crostini Bites
While your cherry mix is poaching, prepare your crostini slices. Using a French loaf, slice into half inch slices. I like to make mine by broiling in the oven. I can get more done at once than using the toaster. Allowing your goat cheese to come up to room temperature makes it easier to spread. For firmer goat cheese, place it in the freezer for five minutes prior to use. This all depends on how much goat cheese you want on each crostini. I think using it as more of a spread rather than a chunk cheese is better. Of course you have your choice of cheeses too. This recipe would work equally as well with either cream cheese or mascarpone, but you will really be missing out on the tartness of the goat cheese. For me, goat cheese just adds another dimension to the bite, and it contains few calories than cream cheese. Also, some recipes call for adding a little olive oil to your crostini before toasting. You can do this, but it seemed like just adding another fat source to the crostini and I did not find it necessary. It does soften the crostini some, so if you prefer that then by all means. Without the added oil the crostini is just a little crispier, which adds another texture to the bite.
Balsamic Poached Cherry and Goat Cheese Crostini
Servings20 crostini’s
Prep Time30 minutes
Ingredients
1Lb fresh ripe cherriespitted and halved
¼cup balsamic vinegar
2tsp fresh thyme leavesmore to taste
1-2 fresh baquettes
8ounces Goat cheesesoftened
Instructions
In a large saucepan on low heat, gently heat vinegar and thyme leaves
Add the cherries and allow to slow simmer on low heat until the vinegar starts to thicken, stirring often. Keep your eye on this as the vinegar can burn easily and if that happens you will need to toss all of it and start again. If this is a huge concern for you, allow the vinegar to thicken prior to adding the cherries and then heat through until the cherries begin to release their juices.
Preheat your oven broiler.
Slice the baquettes into ½" thick slices. Place them on a sheet pan in the oven and gently broil to toast. About 2 to 3 minutes total. Set aside to cool
Spread a layer of goat cheese on each baquette slice and top with the cherry and thyme mix. Drizzle each slice with the remaining reduced vinegar/cherry mix.
If you try this recipe, please share your thoughts about it in the comments below. I am interested to see what adaptations you make, if any, or if you keep it the same.
“The Cherry Orchard’ is a masterpiece, and there can never be too many adaptations”. Stephen Karam
from Recipe Critique https://www.recipecritique.com/balsamic-poached-cherry-and-goat-cheese-crostini/ from Recipe Critique https://recipecritique.tumblr.com/post/177243823963
0 notes
Text
Balsamic Poached Cherry and Goat Cheese Crostini
“Tension translates to your guests. They’ll have a much better time having chili and baked potatoes than they would if you did roast duck with a wild cherry sauce and then had to lie down and cry for a while”. Nigella Lawson
Cherry and Goat Cheese Crostini
Here we have two of my favorites in one tangy, sweet and savory mouthful at the same time. This balsamic poached cherry and goat cheese crostini is often the first appetizer finished and the last spoken about. It’s very easy to make, just pit your cherries, and put them to poach in the balsamic vinegar. While they are poaching, toast your crostini and slather on room temperature goat cheese. Allow the cherry mix to cool enough so it does not melt your cheese. Then top each crostini with a tablespoon of the cherry mix. Using a good cherry pitter makes this an easy bite to put together ahead of time and then serve at room temperature, just store in the fridge until ready to eat. To up the savory aspect, I added a few sprigs of thyme leaves to the balsamic vinegar for poaching the cherries. This adds a dimension to the flavor that you do not see coming. Believe me, one crostini is never enough, so be sure to make enough.
Balsamic and Thyme Poached Cherry Compote
Poaching the cherries in the balsamic vinegar and thyme creates a deliciously, rich syrupy compote that is to die for. The acidity in the balsamic vinegar is just enough to marry the thyme, vinegar and cherry flavors together so that none of these flavor profiles are dominate over the others. You end up with fruit compote that is sweet, tart and savory all at once. Please be sure to poach the cherries on a very low heat to prevent burning the vinegar, stirring occasionally to meld the flavors together.
Build Your Crostini Bites
While your cherry mix is poaching, prepare your crostini slices. Using a French loaf, slice into half inch slices. I like to make mine by broiling in the oven. I can get more done at once than using the toaster. Allowing your goat cheese to come up to room temperature makes it easier to spread. For firmer goat cheese, place it in the freezer for five minutes prior to use. This all depends on how much goat cheese you want on each crostini. I think using it as more of a spread rather than a chunk cheese is better. Of course you have your choice of cheeses too. This recipe would work equally as well with either cream cheese or mascarpone, but you will really be missing out on the tartness of the goat cheese. For me, goat cheese just adds another dimension to the bite, and it contains few calories than cream cheese. Also, some recipes call for adding a little olive oil to your crostini before toasting. You can do this, but it seemed like just adding another fat source to the crostini and I did not find it necessary. It does soften the crostini some, so if you prefer that then by all means. Without the added oil the crostini is just a little crispier, which adds another texture to the bite.
Balsamic Poached Cherry and Goat Cheese Crostini
Servings20 crostini's
Prep Time30 minutes
Ingredients
1Lb fresh ripe cherriespitted and halved
1/4cup balsamic vinegar
2tsp fresh thyme leavesmore to taste
1-2 fresh baquettes
8ounces Goat cheesesoftened
Instructions
In a large saucepan on low heat, gently heat vinegar and thyme leaves
Add the cherries and allow to slow simmer on low heat until the vinegar starts to thicken, stirring often. Keep your eye on this as the vinegar can burn easily and if that happens you will need to toss all of it and start again. If this is a huge concern for you, allow the vinegar to thicken prior to adding the cherries and then heat through until the cherries begin to release their juices.
Preheat your oven broiler.
Slice the baquettes into 1/2" thick slices. Place them on a sheet pan in the oven and gently broil to toast. About 2 to 3 minutes total. Set aside to cool
Spread a layer of goat cheese on each baquette slice and top with the cherry and thyme mix. Drizzle each slice with the remaining reduced vinegar/cherry mix.
If you try this recipe, please share your thoughts about it in the comments below. I am interested to see what adaptations you make, if any, or if you keep it the same.
“The Cherry Orchard’ is a masterpiece, and there can never be too many adaptations”. Stephen Karam
source https://www.recipecritique.com/balsamic-poached-cherry-and-goat-cheese-crostini/ from Recipe Critique https://recipecritiquecom.blogspot.com/2018/08/balsamic-poached-cherry-and-goat-cheese.html
0 notes
Text
Balsamic Poached Cherry and Goat Cheese Crostini
“Tension translates to your guests. They’ll have a much better time having chili and baked potatoes than they would if you did roast duck with a wild cherry sauce and then had to lie down and cry for a while”. Nigella Lawson
Cherry and Goat Cheese Crostini
Here we have two of my favorites in one tangy, sweet and savory mouthful at the same time. This balsamic poached cherry and goat cheese crostini is often the first appetizer finished and the last spoken about. It’s very easy to make, just pit your cherries, and put them to poach in the balsamic vinegar. While they are poaching, toast your crostini and slather on room temperature goat cheese. Allow the cherry mix to cool enough so it does not melt your cheese. Then top each crostini with a tablespoon of the cherry mix. Using a good cherry pitter makes this an easy bite to put together ahead of time and then serve at room temperature, just store in the fridge until ready to eat. To up the savory aspect, I added a few sprigs of thyme leaves to the balsamic vinegar for poaching the cherries. This adds a dimension to the flavor that you do not see coming. Believe me, one crostini is never enough, so be sure to make enough.
Balsamic and Thyme Poached Cherry Compote
Poaching the cherries in the balsamic vinegar and thyme creates a deliciously, rich syrupy compote that is to die for. The acidity in the balsamic vinegar is just enough to marry the thyme, vinegar and cherry flavors together so that none of these flavor profiles are dominate over the others. You end up with fruit compote that is sweet, tart and savory all at once. Please be sure to poach the cherries on a very low heat to prevent burning the vinegar, stirring occasionally to meld the flavors together.
Build Your Crostini Bites
While your cherry mix is poaching, prepare your crostini slices. Using a French loaf, slice into half inch slices. I like to make mine by broiling in the oven. I can get more done at once than using the toaster. Allowing your goat cheese to come up to room temperature makes it easier to spread. For firmer goat cheese, place it in the freezer for five minutes prior to use. This all depends on how much goat cheese you want on each crostini. I think using it as more of a spread rather than a chunk cheese is better. Of course you have your choice of cheeses too. This recipe would work equally as well with either cream cheese or mascarpone, but you will really be missing out on the tartness of the goat cheese. For me, goat cheese just adds another dimension to the bite, and it contains few calories than cream cheese. Also, some recipes call for adding a little olive oil to your crostini before toasting. You can do this, but it seemed like just adding another fat source to the crostini and I did not find it necessary. It does soften the crostini some, so if you prefer that then by all means. Without the added oil the crostini is just a little crispier, which adds another texture to the bite.
Balsamic Poached Cherry and Goat Cheese Crostini
Servings20 crostini's
Prep Time30 minutes
Ingredients
1Lb fresh ripe cherriespitted and halved
1/4cup balsamic vinegar
2tsp fresh thyme leavesmore to taste
1-2 fresh baquettes
8ounces Goat cheesesoftened
Instructions
In a large saucepan on low heat, gently heat vinegar and thyme leaves
Add the cherries and allow to slow simmer on low heat until the vinegar starts to thicken, stirring often. Keep your eye on this as the vinegar can burn easily and if that happens you will need to toss all of it and start again. If this is a huge concern for you, allow the vinegar to thicken prior to adding the cherries and then heat through until the cherries begin to release their juices.
Preheat your oven broiler.
Slice the baquettes into 1/2" thick slices. Place them on a sheet pan in the oven and gently broil to toast. About 2 to 3 minutes total. Set aside to cool
Spread a layer of goat cheese on each baquette slice and top with the cherry and thyme mix. Drizzle each slice with the remaining reduced vinegar/cherry mix.
If you try this recipe, please share your thoughts about it in the comments below. I am interested to see what adaptations you make, if any, or if you keep it the same.
“The Cherry Orchard’ is a masterpiece, and there can never be too many adaptations”. Stephen Karam
from https://www.recipecritique.com/balsamic-poached-cherry-and-goat-cheese-crostini/
from Recipe Critique - Blog http://recipecritique.weebly.com/blog/balsamic-poached-cherry-and-goat-cheese-crostini
0 notes
Link
Vegetarian Curry Pies.
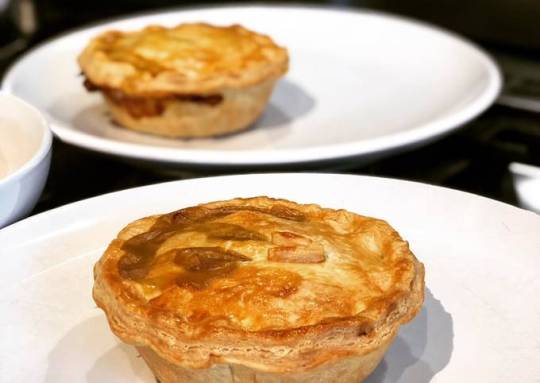
Hello everybody, I hope you are having an incredible day today. Today, I will show you a way to prepare a distinctive dish, vegetarian curry pies. One of my favorites. This time, I will make it a bit unique. This will be really delicious.
Vegetarian Curry Pies is one of the most favored of current trending foods in the world. It is appreciated by millions every day. It's simple, it is fast, it tastes yummy. Vegetarian Curry Pies is something that I have loved my entire life. They are nice and they look wonderful.
To begin with this particular recipe, we must first prepare a few ingredients. You can cook vegetarian curry pies using 22 ingredients and 9 steps. Here is how you can achieve that.
The ingredients needed to make Vegetarian Curry Pies:
{Get of For the shortcrust pastry.
{Prepare 367 g of plain flour.
{Take of Large pinch fine salt.
{Take 1 of large egg.
{Prepare 1 1/2 tsp of lemon juice.
{Prepare 4 TBSP of very cold water.
{Prepare 180 g of cold unsalted butter, cubed.
{Take of For the filling.
{Get 1 tbsp of sesame oil.
{Prepare 1 of red onion, finely chopped.
{Make ready 3 of garlic cloves, crushed.
{Get 15 g of fresh ginger, peeled and finely chopped.
{Take 3 of bird’s eye chillis, de seeded and diced.
{Get 1/2 tbsp of turmeric.
{Get 1/2 tbsp of ground cumin.
{Make ready 400 g of sweet potato, cut into equal chunks.
{Make ready 150 g of red split lentils.
{Prepare 1/2 can of chickpeas drained.
{Make ready 800 ml of veg stock.
{Make ready 100 g of spinnach.
{Make ready 1/2-1 can of full fat coconut milk.
{Prepare 80 g of sultanas.
Steps to make Vegetarian Curry Pies:
First, make the filling. Heat the oil in a wide-based saucepan with a tight fitting lid. Add the onion and cook over a low heat for 10 minutes, stirring occasionally. Add the garlic, ginger and chilli and cook for 1 minute, then add the spices and cook for a further minute..
Turn up the heat to medium and add the sweet potato and sultanas, stirring well to coat in the spices. Yup in the lentils and most of the stock. You may not need all the stock so add a few ladles to start and see how well things get absorbed. Bring the liquid to the boil, reduce to a simmer, cover with lid and cook gently for 20 minutes or until sweet potato is tender..
Stir in the coconut milk (again, a ladle at a time so it doesn’t become too liquidy. Add the chickpeas and spinach and gently stir in..
Set this aside while you make the pastry. Have ready 4 individual non-stick pie dishes. Put the flour and salt into a large mixing bowl. Lightly beat the egg with the lemon juice and water in a jug and set aside..
Add the butter and toss the cubes in the flour to coat. Rub the butter into the flour, using your fingertips. Lift your hands above the bowl, rubbing the fat and flour together then letting the mixture fall back into the bowl. Keep going until the mixture resembles fine breadcrumbs..
Make a well in the centre of the mixture and pour in the egg mix. Incorporate the liquid into the flour/fat using a claw-like action with one had. Avoid overworking the dough. If too dry, a splash more water..
When the dough just sticks together in clumps, form it into a ball. Knead it very lightly on a floured surface to bring it together into a smooth dough. Wrap in cling film and refrigerate for 30 minutes..
Roll out two thirds of the dough to the thickness of a £1 coin. Cut out circles and press into the pie dishes to line completely. Take the remaining third of the pastry to roll out and cut out the lids. Preheat the oven to 200 degrees C fan..
To assemble the pies: spoon the curry filling into the pastry cases until level. Brush the edges of the pastry with water, place the pastry lid on top and press down. Using your thumbs and fingertips, seal the pastry together. Brush with beaten egg, make two slits in the lid to allow steam to escape and pop in the oven for 30 minutes or until nicely golden brown..
So that is going to wrap it up with this exceptional food vegetarian curry pies recipe. Thank you very much for reading. I'm sure that you will make this at home. There is gonna be more interesting food at home recipes coming up. Remember to save this page on your browser, and share it to your loved ones, friends and colleague. Thank you for reading. Go on get cooking!
0 notes
Text
Balsamic Poached Cherry and Goat Cheese Crostini
“Tension translates to your guests. They’ll have a much better time having chili and baked potatoes than they would if you did roast duck with a wild cherry sauce and then had to lie down and cry for a while”. Nigella Lawson
Cherry and Goat Cheese Crostini
Here we have two of my favorites in one tangy, sweet and savory mouthful at the same time. This balsamic poached cherry and goat cheese crostini is often the first appetizer finished and the last spoken about. It’s very easy to make, just pit your cherries, and put them to poach in the balsamic vinegar. While they are poaching, toast your crostini and slather on room temperature goat cheese. Allow the cherry mix to cool enough so it does not melt your cheese. Then top each crostini with a tablespoon of the cherry mix. Using a good cherry pitter makes this an easy bite to put together ahead of time and then serve at room temperature, just store in the fridge until ready to eat. To up the savory aspect, I added a few sprigs of thyme leaves to the balsamic vinegar for poaching the cherries. This adds a dimension to the flavor that you do not see coming. Believe me, one crostini is never enough, so be sure to make enough.
Balsamic and Thyme Poached Cherry Compote
Poaching the cherries in the balsamic vinegar and thyme creates a deliciously, rich syrupy compote that is to die for. The acidity in the balsamic vinegar is just enough to marry the thyme, vinegar and cherry flavors together so that none of these flavor profiles are dominate over the others. You end up with fruit compote that is sweet, tart and savory all at once. Please be sure to poach the cherries on a very low heat to prevent burning the vinegar, stirring occasionally to meld the flavors together.
Build Your Crostini Bites
While your cherry mix is poaching, prepare your crostini slices. Using a French loaf, slice into half inch slices. I like to make mine by broiling in the oven. I can get more done at once than using the toaster. Allowing your goat cheese to come up to room temperature makes it easier to spread. For firmer goat cheese, place it in the freezer for five minutes prior to use. This all depends on how much goat cheese you want on each crostini. I think using it as more of a spread rather than a chunk cheese is better. Of course you have your choice of cheeses too. This recipe would work equally as well with either cream cheese or mascarpone, but you will really be missing out on the tartness of the goat cheese. For me, goat cheese just adds another dimension to the bite, and it contains few calories than cream cheese. Also, some recipes call for adding a little olive oil to your crostini before toasting. You can do this, but it seemed like just adding another fat source to the crostini and I did not find it necessary. It does soften the crostini some, so if you prefer that then by all means. Without the added oil the crostini is just a little crispier, which adds another texture to the bite.
Balsamic Poached Cherry and Goat Cheese Crostini
Servings20 crostini's
Prep Time30 minutes
Ingredients
1Lb fresh ripe cherriespitted and halved
1/4cup balsamic vinegar
2tsp fresh thyme leavesmore to taste
1-2 fresh baquettes
8ounces Goat cheesesoftened
Instructions
In a large saucepan on low heat, gently heat vinegar and thyme leaves
Add the cherries and allow to slow simmer on low heat until the vinegar starts to thicken, stirring often. Keep your eye on this as the vinegar can burn easily and if that happens you will need to toss all of it and start again. If this is a huge concern for you, allow the vinegar to thicken prior to adding the cherries and then heat through until the cherries begin to release their juices.
Preheat your oven broiler.
Slice the baquettes into 1/2" thick slices. Place them on a sheet pan in the oven and gently broil to toast. About 2 to 3 minutes total. Set aside to cool
Spread a layer of goat cheese on each baquette slice and top with the cherry and thyme mix. Drizzle each slice with the remaining reduced vinegar/cherry mix.
If you try this recipe, please share your thoughts about it in the comments below. I am interested to see what adaptations you make, if any, or if you keep it the same.
“The Cherry Orchard’ is a masterpiece, and there can never be too many adaptations”. Stephen Karam
from Recipe Critique https://www.recipecritique.com/balsamic-poached-cherry-and-goat-cheese-crostini/
0 notes
Text
‘FRISCO FOOD DECODED
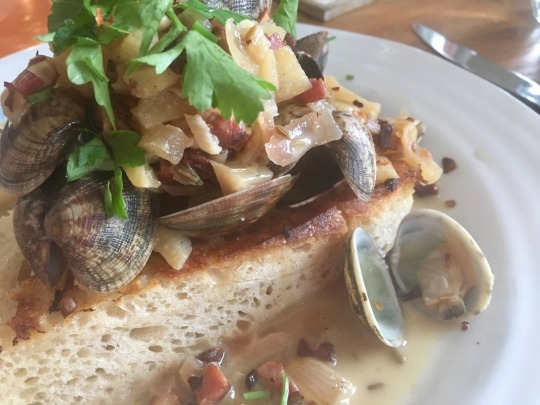
There are times – desperate, self-loathing times - when Starbucks can be your best friend. San Francisco at 5.30am is one of those times.
When you sleep the sleep of the terminally insane after an eleven-hour flight, and the only thing that will stop the spiteful, insistent pumping in your head is a flat white and a toasted bagel, the Green Machine on Grant Street delivers when all around it are resolutely shut until way after sunrise.
Are you going to San Francisco? If so, you will need to plan your food because ‘Friscans breakfast late and dine early. Like, 5PM early. The rest of the time, many a working San Franciscan can be seen gliding purposefully, some on rollerblades, most in smart-casual, clutching their macrobiotic lunch boxes on their way to their fintech start-up/angel investor / power spin at Soul Cycle. All pencil slender, glowingly healthy slaves to the algorithm.
After 9PM, when most of Europe and all of South America is just getting started, no one seems interested in rustling you up something tasty. Some restaurants start managing you out of the door after 8 in the evening. Room service grinds to a similar halt and good luck trying a delivery app if you don’t have a US phone. One evening recently, rabid with hunger after a full day at work and a lengthy late workout, the lady in my hotel reception took pity on me and surreptitiously shunted me a note with the name of a local pizza takeaway, which delivered until 2AM. The pizza was delicious – mushroom and feta on a crisp, sourdough crust – but I am sure I detected a hint of New York, not SF, sass when I made the phone order.
However, when you do succeed in squeezing your food into a 9-5 window, it’s worth the time management. I have my personal favourites, and there isn’t a spoonful of spirulina among them. Here are my top five:
Mr Holmes Bakehouse

If you spot badgers as a pastime, then you have the skills to catch Mr Holmes in the few hours they are open. To be fair, this Mr Holmes is an outpost of the Los Angeles original and their tiny premises serve up unctuous, matcha-iced croissants, doughnuts filled with chilli-lime crème pat and more, between 7AM and 2PM. Maybe go a little later if you are on your own: it’s more lower Nob Hill than Tenderloin - the epicentre of the City’s crack problem - but it still doesn’t feel like the safest district to walk around before daybreak.
Chinatown – Old and New

Aside from Sydney, no one does Chinatown like San Francisco. My first experience of it was eating Dim Sum at the City View Restaurant (which, by the way, has no view, of the City or otherwise). We went in intending to order sensibly. Half an hour later we’d gone rogue, stuffing succulent Duck Gyoza into our mouths like Animal the muppet. Newer to the area, China Live on Broadway is a multi-layered emporium of bistro, fine dining and shop. It’s also opposite that 50’s style homage to Psycho, the Royal Pacific Motel, which I intend to stay in someday just for the Instagram creds.

Not something I normally say about a Chinese restaurant, China Live serves a number of delicious vegetarian dishes. These include red dumplings stuffed with scallops and peas, together with some imaginative fish and seafood, heroing the Dungeness Crab (seems to be a thing in this City).

The shop also sold a work of art masquerading as a frying pan which I have been tearing my hair out trying to track down online ever since.
The Food Trucks near Battery Street

If you like Viet, Thai, Indonesian or Malaysian food, then google map these trucks on a Wednesday. The tastiest of them all is The Chairman, serving baked or steamed Bao. Too cool to make an obvious pun of their name and speciality, they let you do the math.

Their crispy pork belly baked Bao is like a luxe burger and the bao chips with seaweed salt (basically deep-fried wonton wrappers) are the fries you never knew you needed.
Boudin’s Sourdough Factory
Yes, it’s by Fisherman’s Wharf, yes, it’s a tourist trap, but damn it! I love their chewy sourdough. Hollowed out and filled with New England Clam Chowder and a basil and cucumber cocktail on the side, thank you please. I used to be able to buy a loaf at the airport in departures, and it was still tasty when toasted a week later in London.
Contigo
In need of some sophistication? Poor you! Well, rich you if you fancy heading to this delicious riff on a Spanish Tapas kitchen in the Castro District. Some lovely vegetarian options, but my hands down favourite dish was their beef cheeks. Not on the menu now as we head into summer, but their current menu is sporting some pretty compelling mechouli lamb.
Wherever you choose to leave your heart, honeymoon or get drunk in San Fran (all genuine songs about the City), try out any or all of these three nods to its cuisine. And eat them at whatever time of day you like.
Clam Sourdough Crostini
It’s the texture of Sourdough that I think is so wonderful – and the way it sponges up the juices of whatever you are cooking. This little number, inspired by a recipe from Harts in Brooklyn, could be served equally well without the clam shells, but the end result wouldn’t look as pretty and scooping out the clam meat at the table at the table is part of the fun. Serves 2-3
Ingredients:
4 tbsp. Olive oil
50g diced pancetta or lardons
4 garlic cloves, 2 sliced 2 left whole
2 banana shallots, finely chopped
½ a fennel bulb, chopped
2 strips lemon zest
1 bay leaf
½ tsp. ground fennel (or smash fennel seeds in a pestle and mortar)
1 glass dry white wine
500g clams
1 tsp chilli flakes
Small bunch parsley, torn
Drizzle of single cream (optional)
2-3 thick slices ideally San Francsico sourdough
How to Make
Heat half the oil in a large frying pan. Add pancetta or lardons and cook, stirring occasionally, until brown and crisp (around 3-4 mins). Add sliced garlic and cook, stirring, until garlic is golden.
Reduce heat and add the shopped shallots and fennel. Cook, stirring occasionally, until softened and onion is translucent. Add lemon zest, bay leaf, ground fennel, ½ cup wine and a pinch of salt. Increase heat, stirring occasionally, until wine is mostly reduced but mixture is still reasonably fluid (this should take about 2-3 minutes). Transfer mixture to a medium bowl; discard lemon zest and bay leaf.
Wipe out the frying pan and pop back on the heat. Heat 2 Tbsp. oil until sizzling. Add sourdough slices and griddle golden brown on both sides. Drain on kitchen towels, then cut 1 garlic clove in half and rub one side of each toast with cut side of garlic.
Back to the frying pan for one last time and heat 1 tbsp. oil. Crush the remaining garlic clove and add to the oil, stirring, until it begins to turn golden. Add clams, the pancetta/ garlic mix and remaining ½ cup wine. Increase heat and bring to a boil. Cook, uncovered, until liquid is reduced by half and clams are open (discard any that do not open), which should take 5–7 minutes. Add a drizzle of cream if desired, together with the chilli flakes and parsley and cook 1 minute longer. Taste and season with kosher salt and more chilli flakes.
Place fried bread on plates and spoon clam mixture and cooking broth over. Drizzle with oil and serve.
Pork Belly Bao
Like I said, food orgasm meets coma once you have eaten a Mr Chairman Bao. Here is my version, using a marinade mix for the pork from China Doll in Sydney.
Makes 10 bao.
Ingredients:
For the Bao dough:
250g plain flour
2 tsp dry active yeast
1 tbsp. Caster sugar
1 tsp kosher salt
100ml tepid water
50ml milk
1 tbsp. sunflower oil
Chopped spring onions and coriander to serve.
For the char siu pork
2 tbsp. sunflower oil
1kilo pork belly, no rind and cut into thick slices
2 tbsp each dark muscovado and 2 tbsp. light brown sugar
4 garlic cloves, finely chopped
Small piece of ginger, sliced
2 star anise
80 ml hoi sin sauce
100 ml Shaoxing wine
2 tbsp. dark soy sauce
100 ml water
¼ tsp five spice powder
Kosher salt and black pepper.
How to make
First, prepare the pork (you can do this ahead and re-heat).
Heat the oven to 160C, or Gas 3.
Season the pork belly generously, heat the oil and brown the pork in a large pot, in batches. Drain and put to one side.
Mix the hoi sin, Shaoxing wine and dark soy sauce in a jug. Drain the saucepan of oil, then put back on the heat, add the sugar and a little water, and watch closely until it starts to turn to caramel. Working quickly, add the chopped garlic, ginger and star anise, stir then add the soy, Shaoxing and hoi sin mix. Add the pork back to the pan, stir to coat, then add the water and the five-spice powder. Cover and pop into the oven for about 1.5 hours.
Take the pot out of the oven and remove the lid (take care to use oven gloves - don’t forget the lid is hot too). Put it on a hob ring and turn the heat up medium/ high, then stir the pork belly while the sauce bubbles down to a sticky mess. Cover and leave to one side.
If you want everything to be ready at the same time, start making the buns while the pork is in the oven. Tip the flour and sugar into a large mixing bowl, preferably in a free-standing mixer with a dough hook. Add the yeast to one side of the flour and the salt to the other (mixing the salt and yeast too soon prevents the yeast from activating). Then add the water, milk and oil and mix with a dough hook for about 10 minutes, until the mix is smooth and elastic.
Pop the ball of dough into a greased bowl, cover and leave for an hour in a warm place until it has doubled in size.
After an hour, tip the dough onto a floured board, and roll it into a sausage, then cut it into 10 equal portions. Have some squares of baking parchment cut and ready on a lightly oiled baking tray or two. Roll each portion of dough into an oval, lightly oil the flat surface, then lay a greased chopstick across it.
Flip one side of the dough over the chopstick so you end up with a half-moon shape, then slide the chopstick out and lay the bun on a square of baking parchment. Repeat with the other 9 portions.
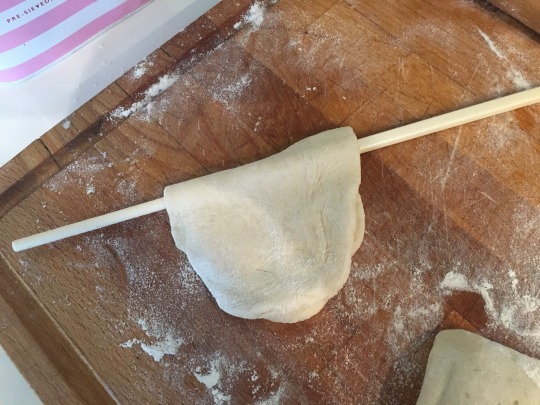
Leave the buns, lightly covered, to rise for another hour.

Heat the water in your steamer, and when coming to a rolling boil, add the buns (as many as will fit at a time) cover and steam for 10 minutes. Transfer to a wire rack to cool.
If you cooked the pork much earlier, reheat by adding a cup of water to loosen up the sticky caramel mixture and simmer for about 10 minutes. Transfer the pork to a plate or board and slice up or shred. Chop the spring onions (green stalks included) and roughly chop the coriander.
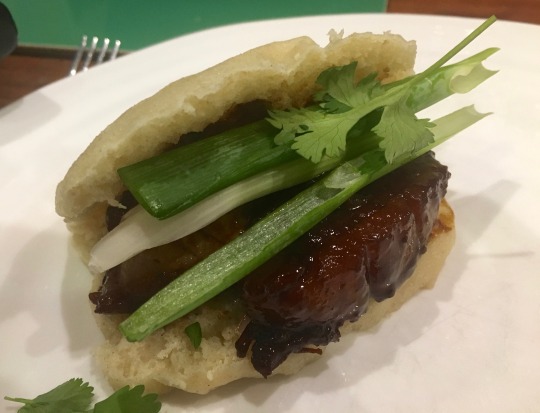
Spit each bun, fill with sliced/ shredded pork, add some spring onions and coriander and serve.
Turmeric Cake
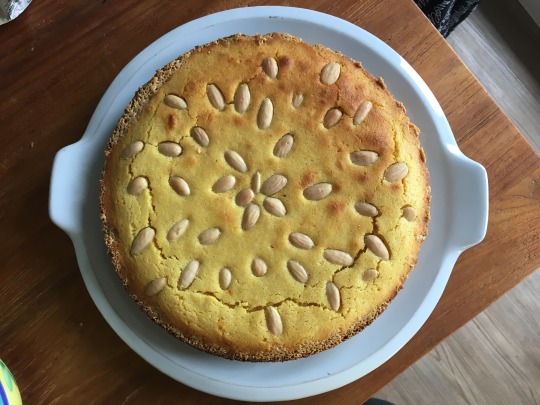
I have never eaten this in ‘Frisco, but I feel that I should have. It’s almost vegan (properly vegan if you swap the milk for almond milk), has the anti-inflammatory rhizome-du- jour, turmeric, as it’s hero ingredient, and has the taste and texture of a light fudge. This is originally a Syrian delicacy and you can find a version in the Almond Bar cookbook. They also sell a delicious version at Café Pera in Twickenham, which uses coconut oil as its fat. It is a combination of the two on which my recipe is based. Serves 10-12.
Ingredients:
440g fine semolina
100g chickpea flour
60g plain flour
1 tsp baking powder
1 cm piece fresh turmeric, peeled and grated
250g coconut oil, melted then cooled.
385g unrefined caster sugar
375 milk or almond milk
2 tbsp. tahini
1 tsp vanilla essence
Whole blanched almonds, toasted.
How to make
Preheat the oven to 190C/ Gas mark 6.
Rub tahini over the base and sides of a 23cm springform cake tin and put to one side.
Combine the flour, chickpea flour, semolina and baking powder in a large mixing bowl.
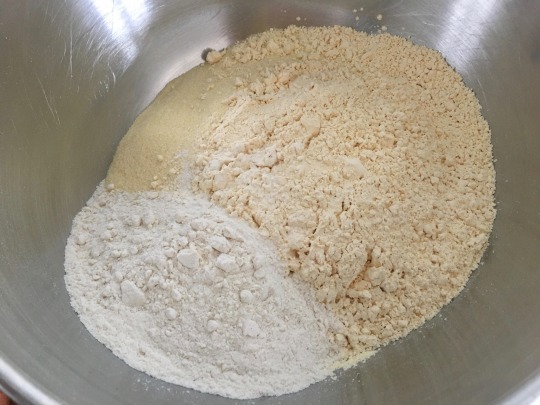
In a separate bowl, combine the melted coconut oil, sugar, vanilla, milk, grated turmeric and 60ml water and whisk together. Pour into the dry ingredients and mix until smooth and golden yellow.
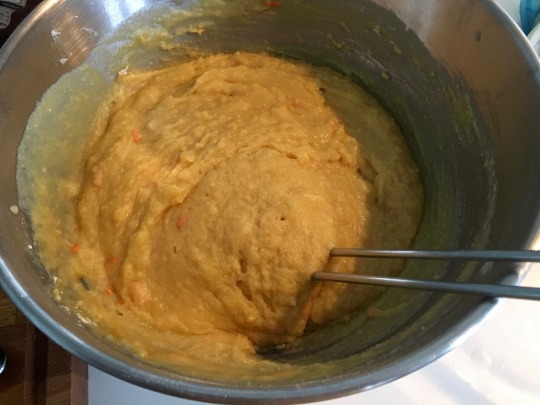
Pour the cake mix into the prepared tin and top with the lightly toasted whole almonds.
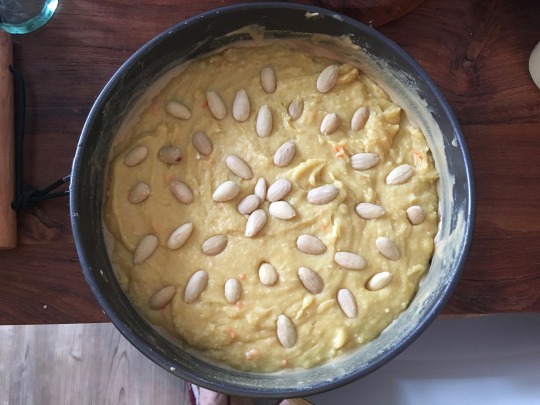
Bake for 35-40 minutes, until the cake turns a golden brown, then remove from the oven and leave in the tin for about 10 minutes before turning out carefully onto a wire rack to cool completely. Transfer to a serving plate.
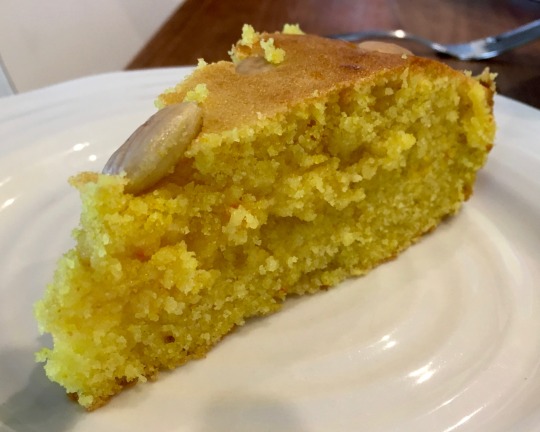
This tin will keep in a tin or wrapped in clingfilm for a week.
0 notes